I’ve worked with quite a few people new to Azure Data Factory, and one thing that seems to confuse new users is the difference between the developer sandbox where we build pipelines, and the published/deployed code. Understanding this is key to working with Git and using CI/CD pipelines to deploy your code, and getting other Azure services to integrate nicely to call your pipelines.
Connecting to ADF
A good first place to start is to understand the different ways we can interact with a data factory.
- Azure Data Factory Studio GUI at adf.azure.com
- PowerShell Az Module
- Azure CLI
- Azure REST API
- ARM Templates
Azure Data Factory Studio is the most familiar place to interact with ADF, as it hosts the development environment and allows us to monitor pipelines. The other 4 ways to interact with ADF are more often used for deploying ADF within a CI/CD pipeline, or integrating ADF with other Azure services.
Split Personality
For each ADF instance we create, there are essentially two views of the code available, the development sandbox and the published code. Of the services above, only Azure Data Factory Studio can interact with the developer sandbox. That is to say that if you deploy code into an ADF instance using Azure CLI, PowerShell Az, the REST API or an ARM template, you will change the code in the published side of ADF, and not the developer sandbox.
Demo Time
Let’s start with a new ADF instance without git integration configured to keep it nice and simple to start with.
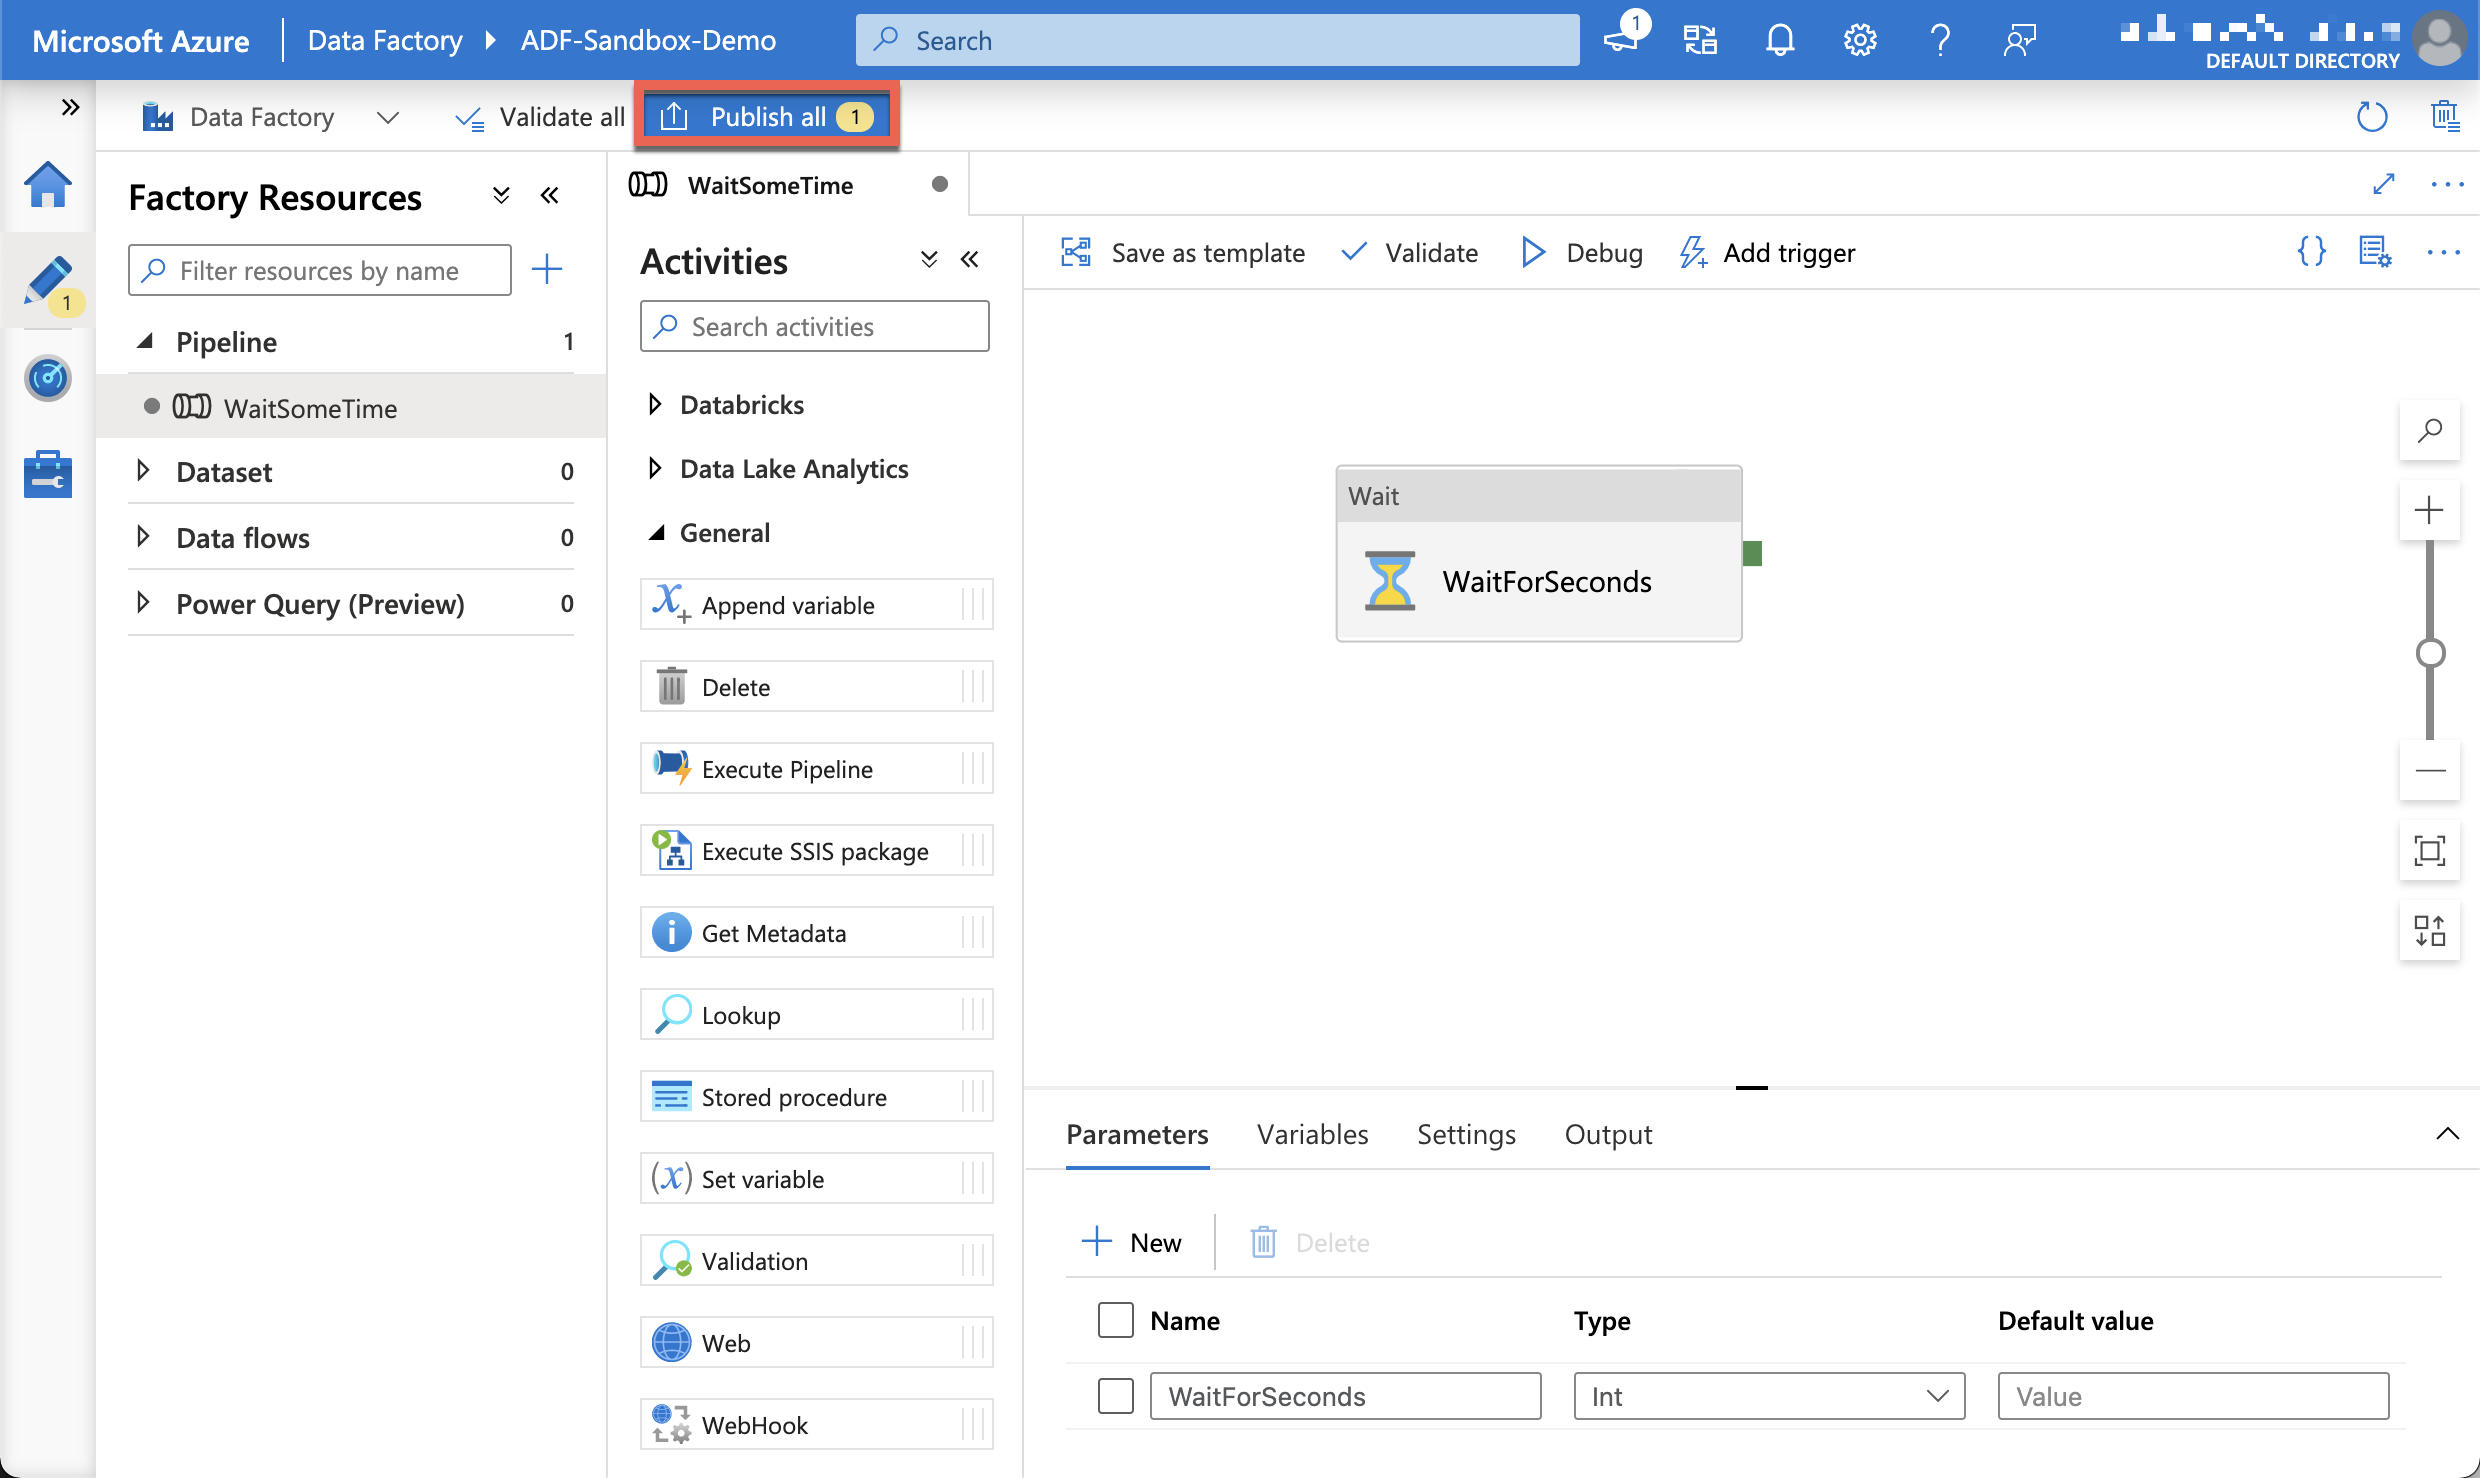
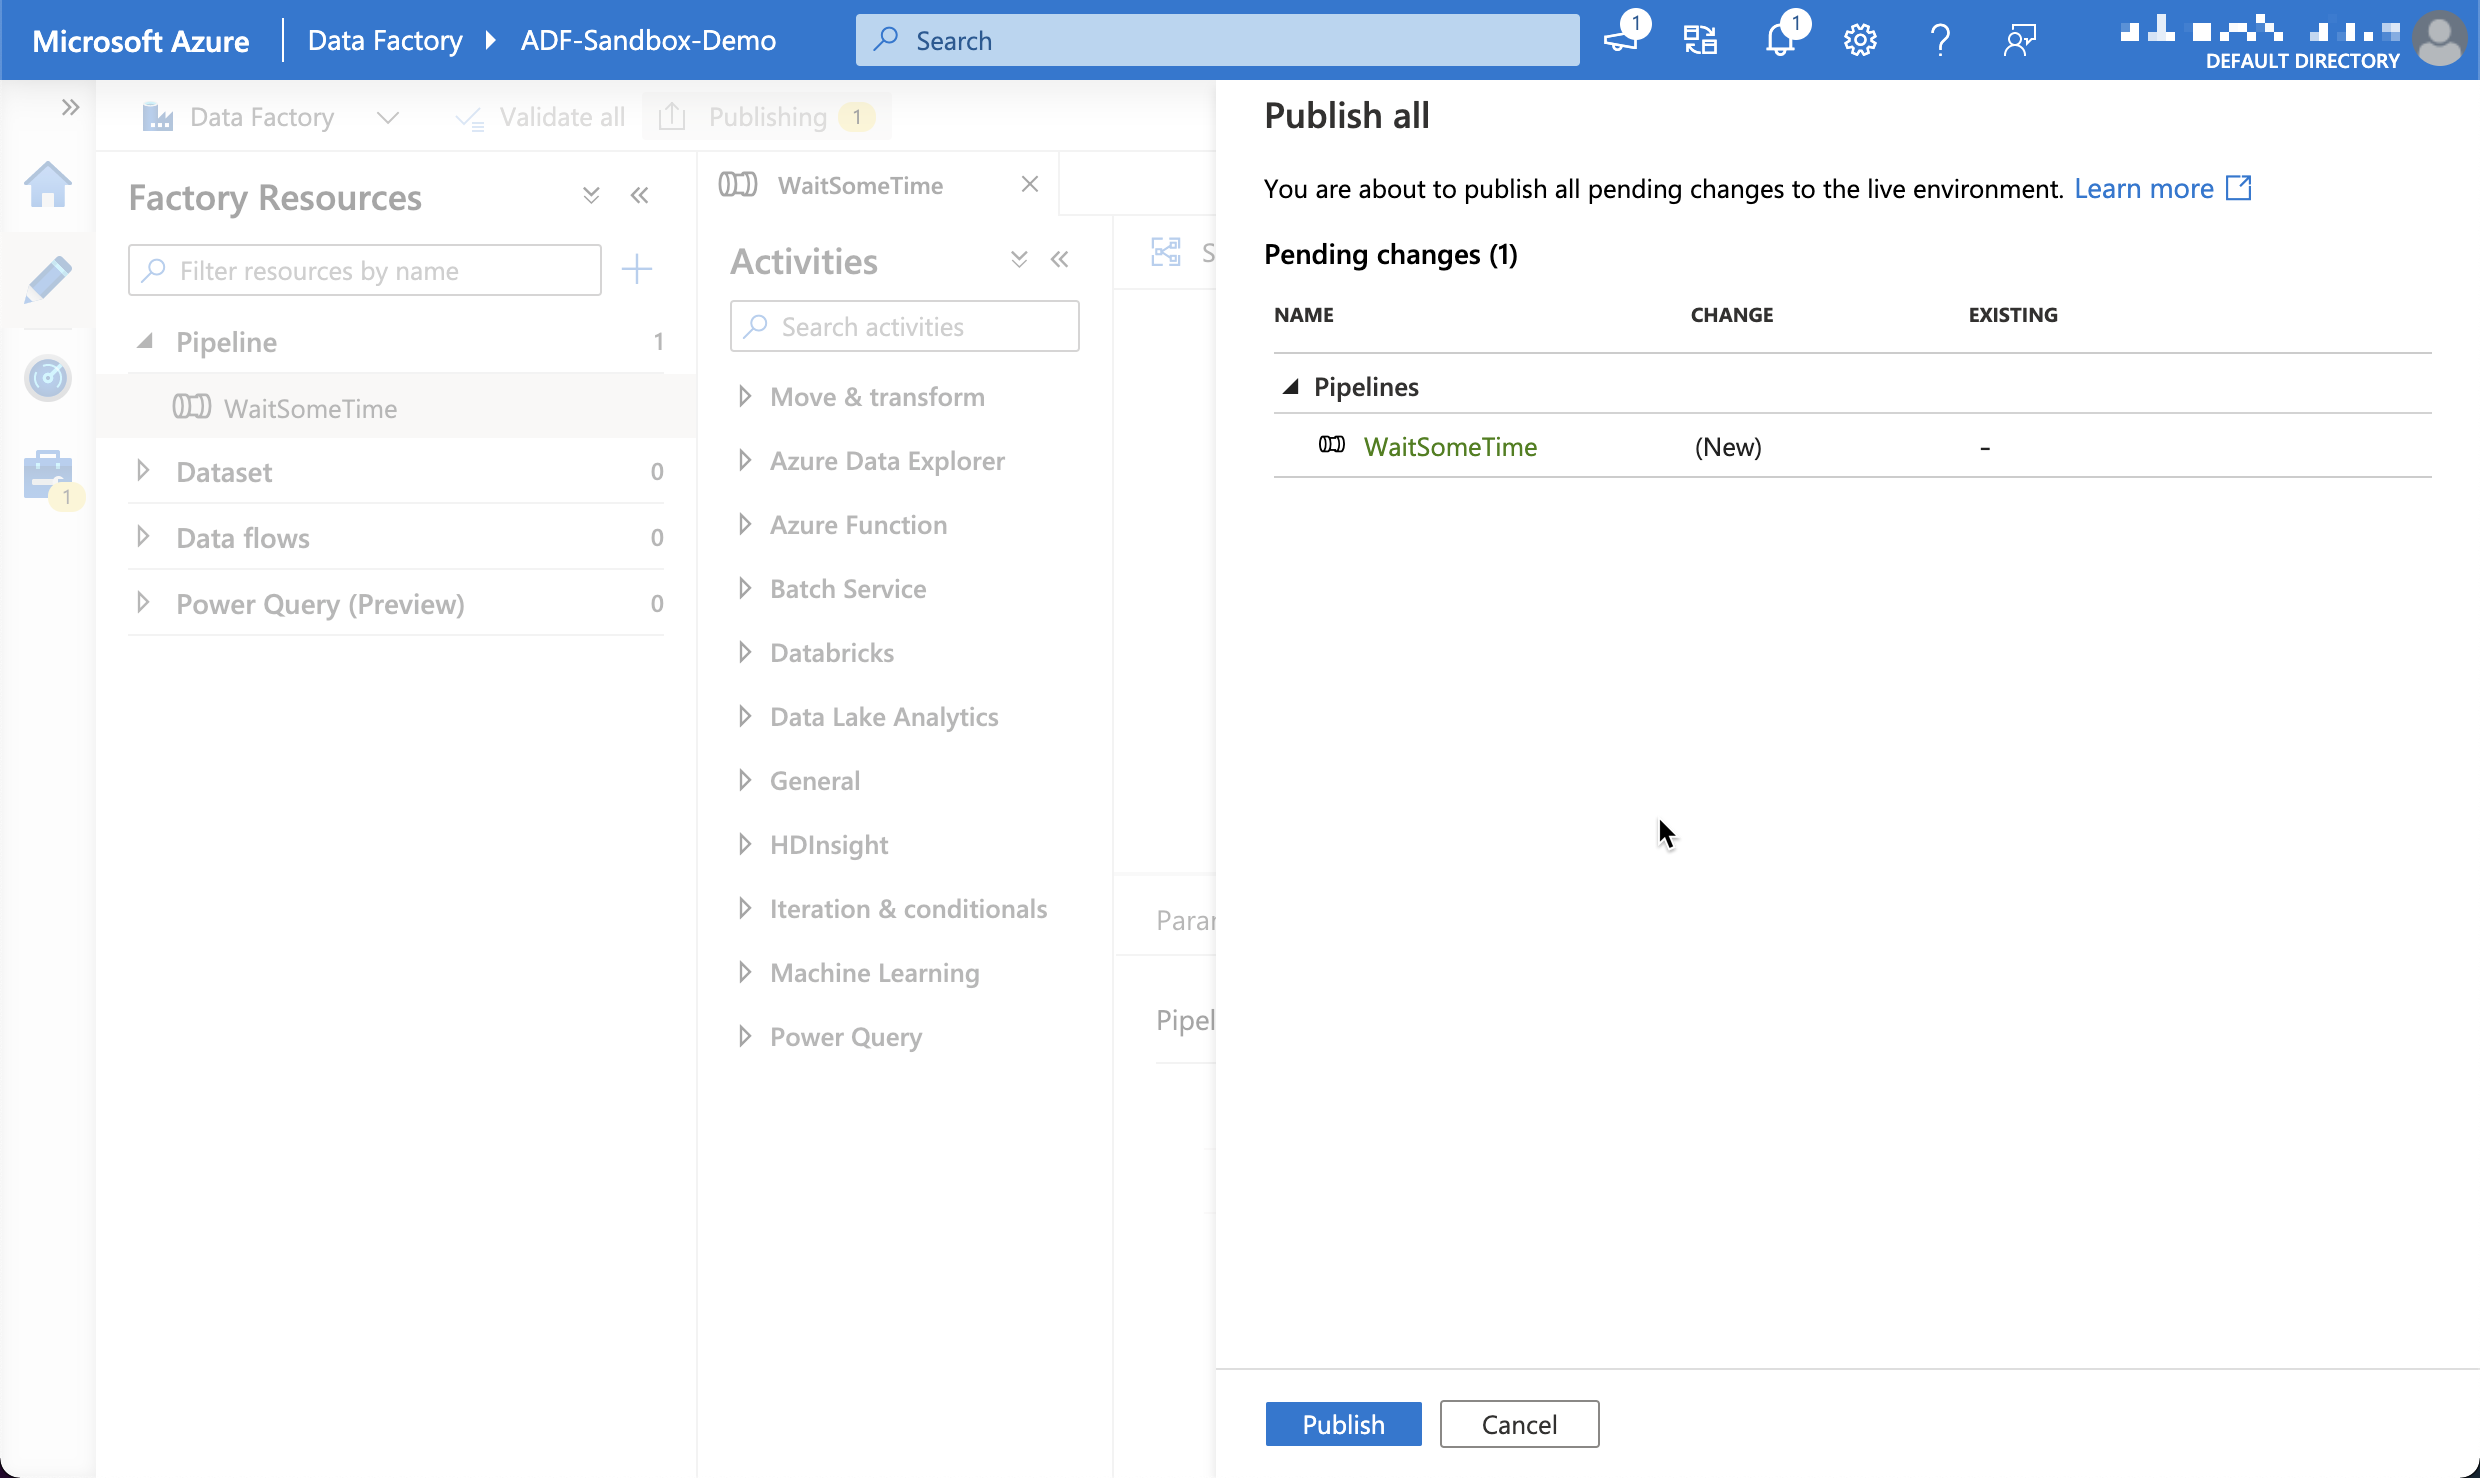
We will create a new pipeline that just has a wait activity to see how the development flow works. The screenshot below shows a super simple pipeline that I have created, but not published yet. The blue publish all button has a yellow indicator to tell us how many objects (linked services, datasets, pipelines, data flows and triggers) have been changed and need to be published.
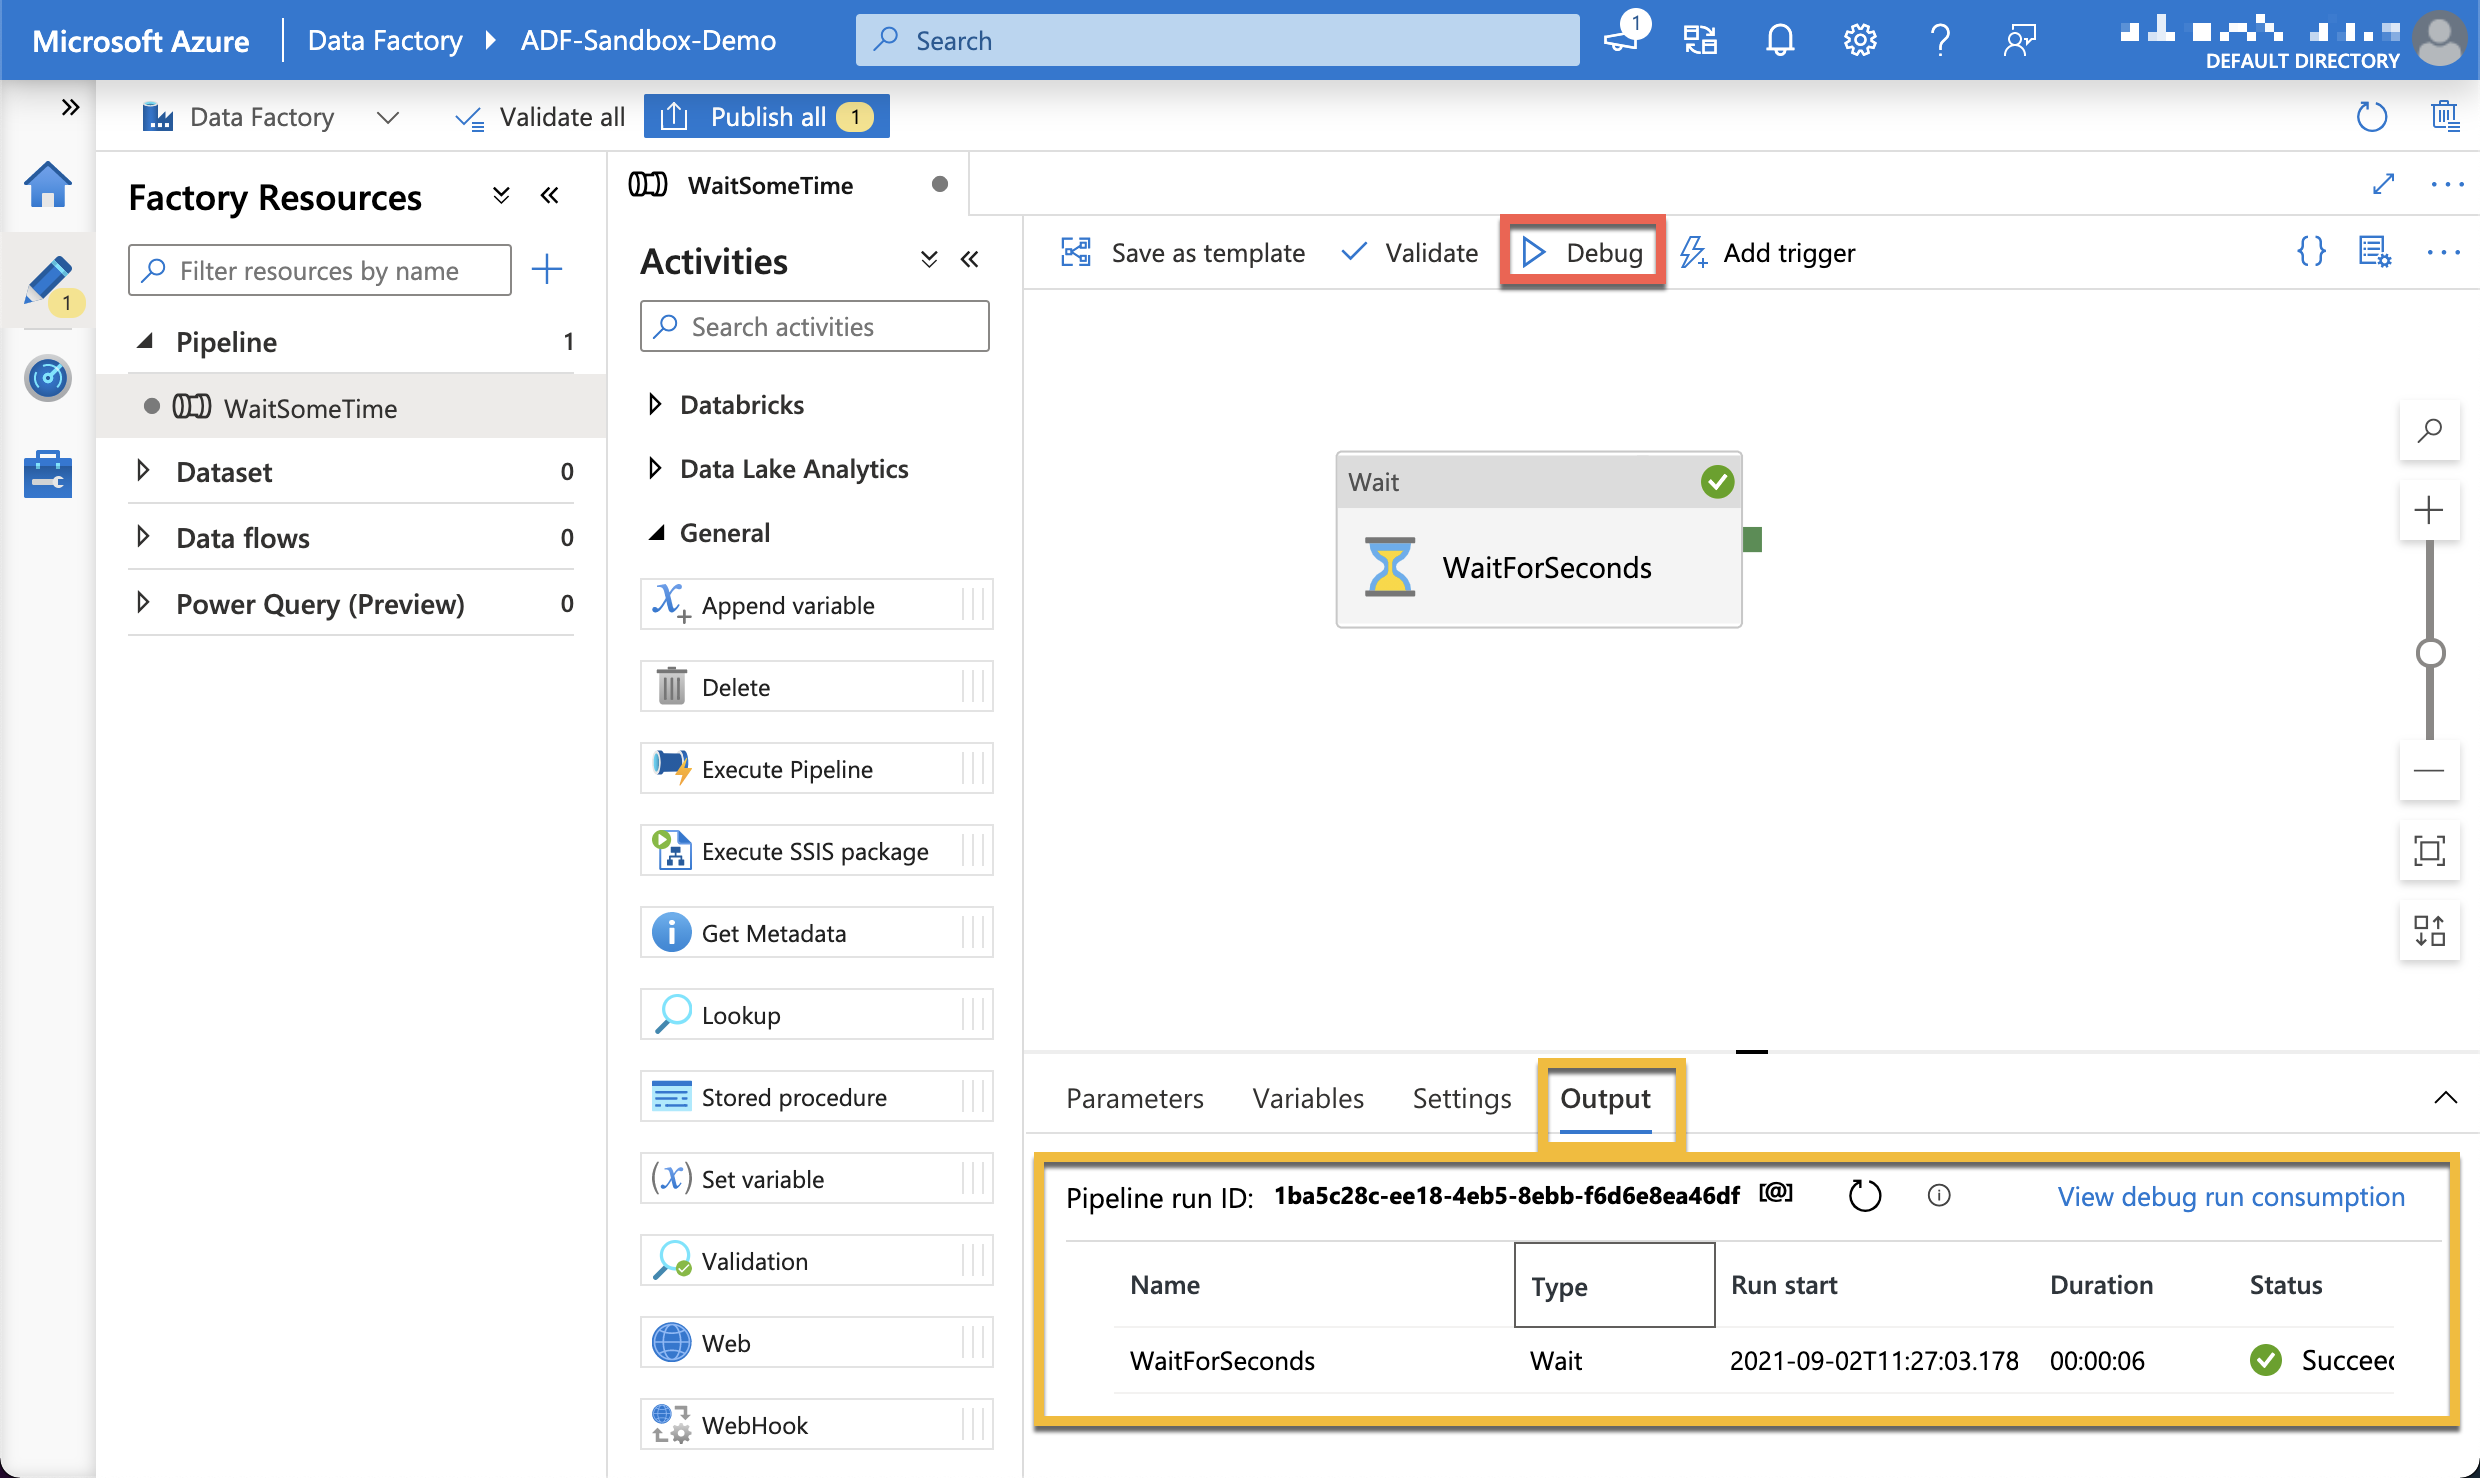
Before we publish code, it is a good idea to test the pipeline. We can hit the debug button and run the pipeline, and the results are shown in the Output tab.
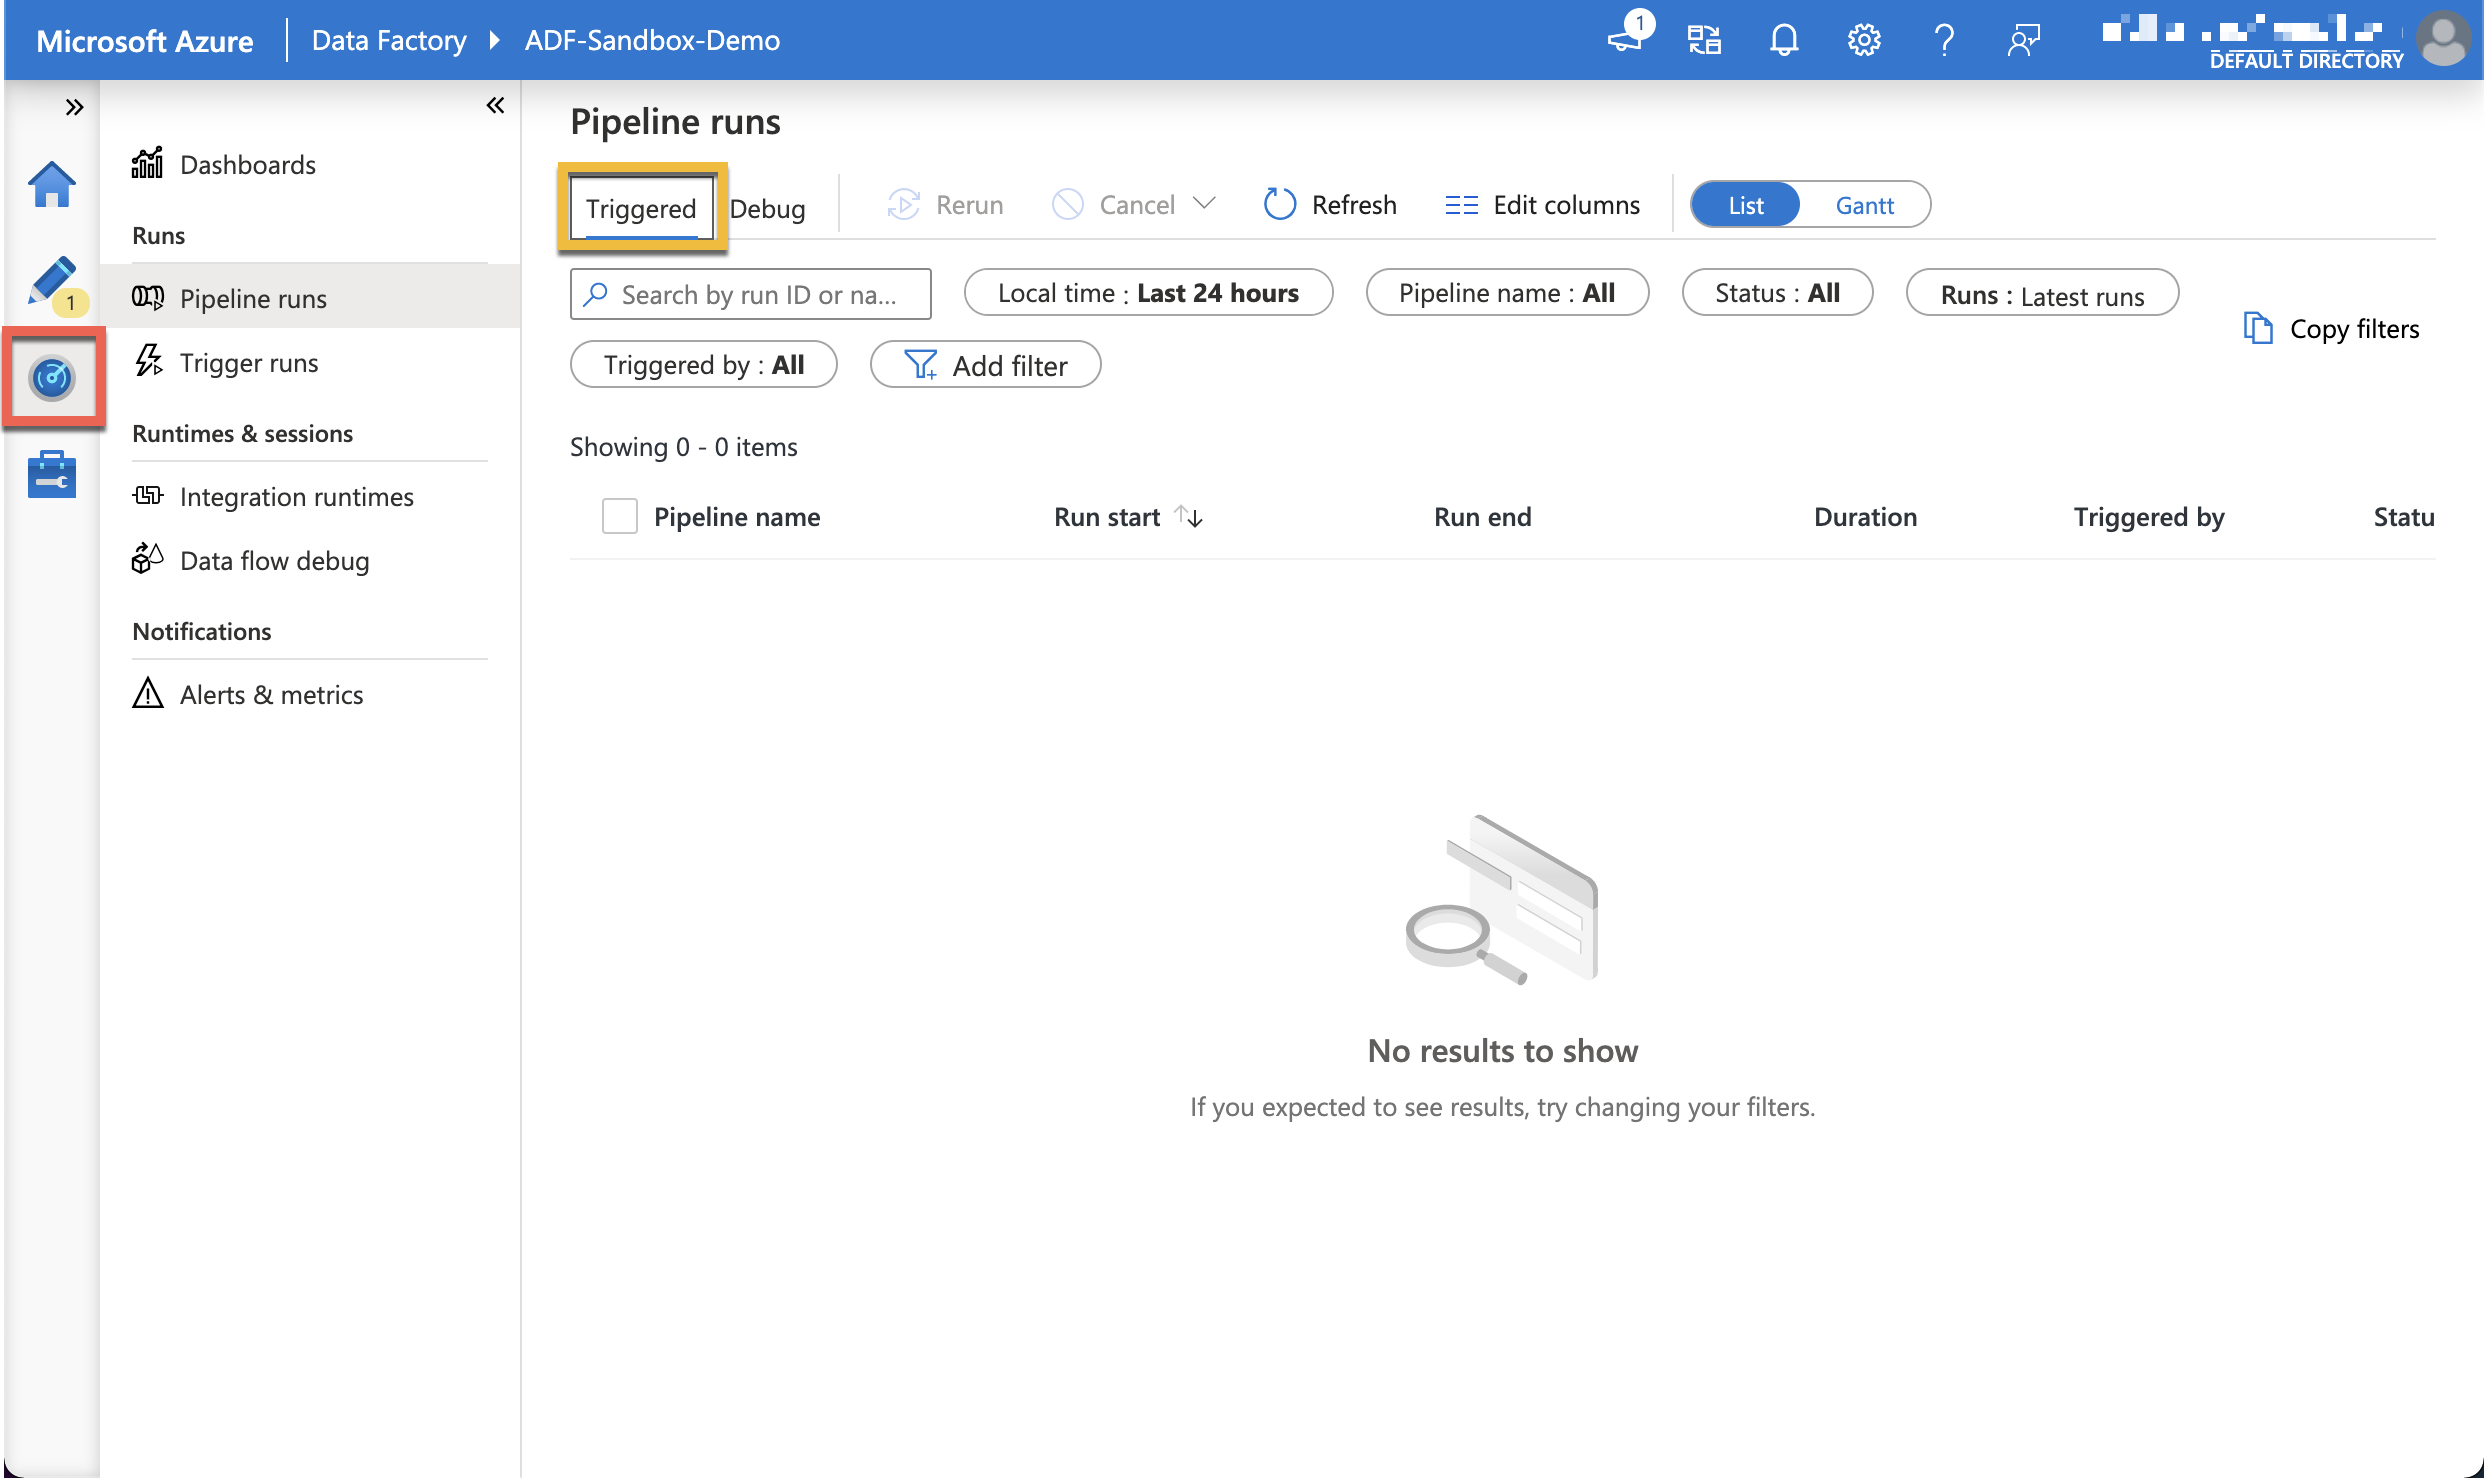
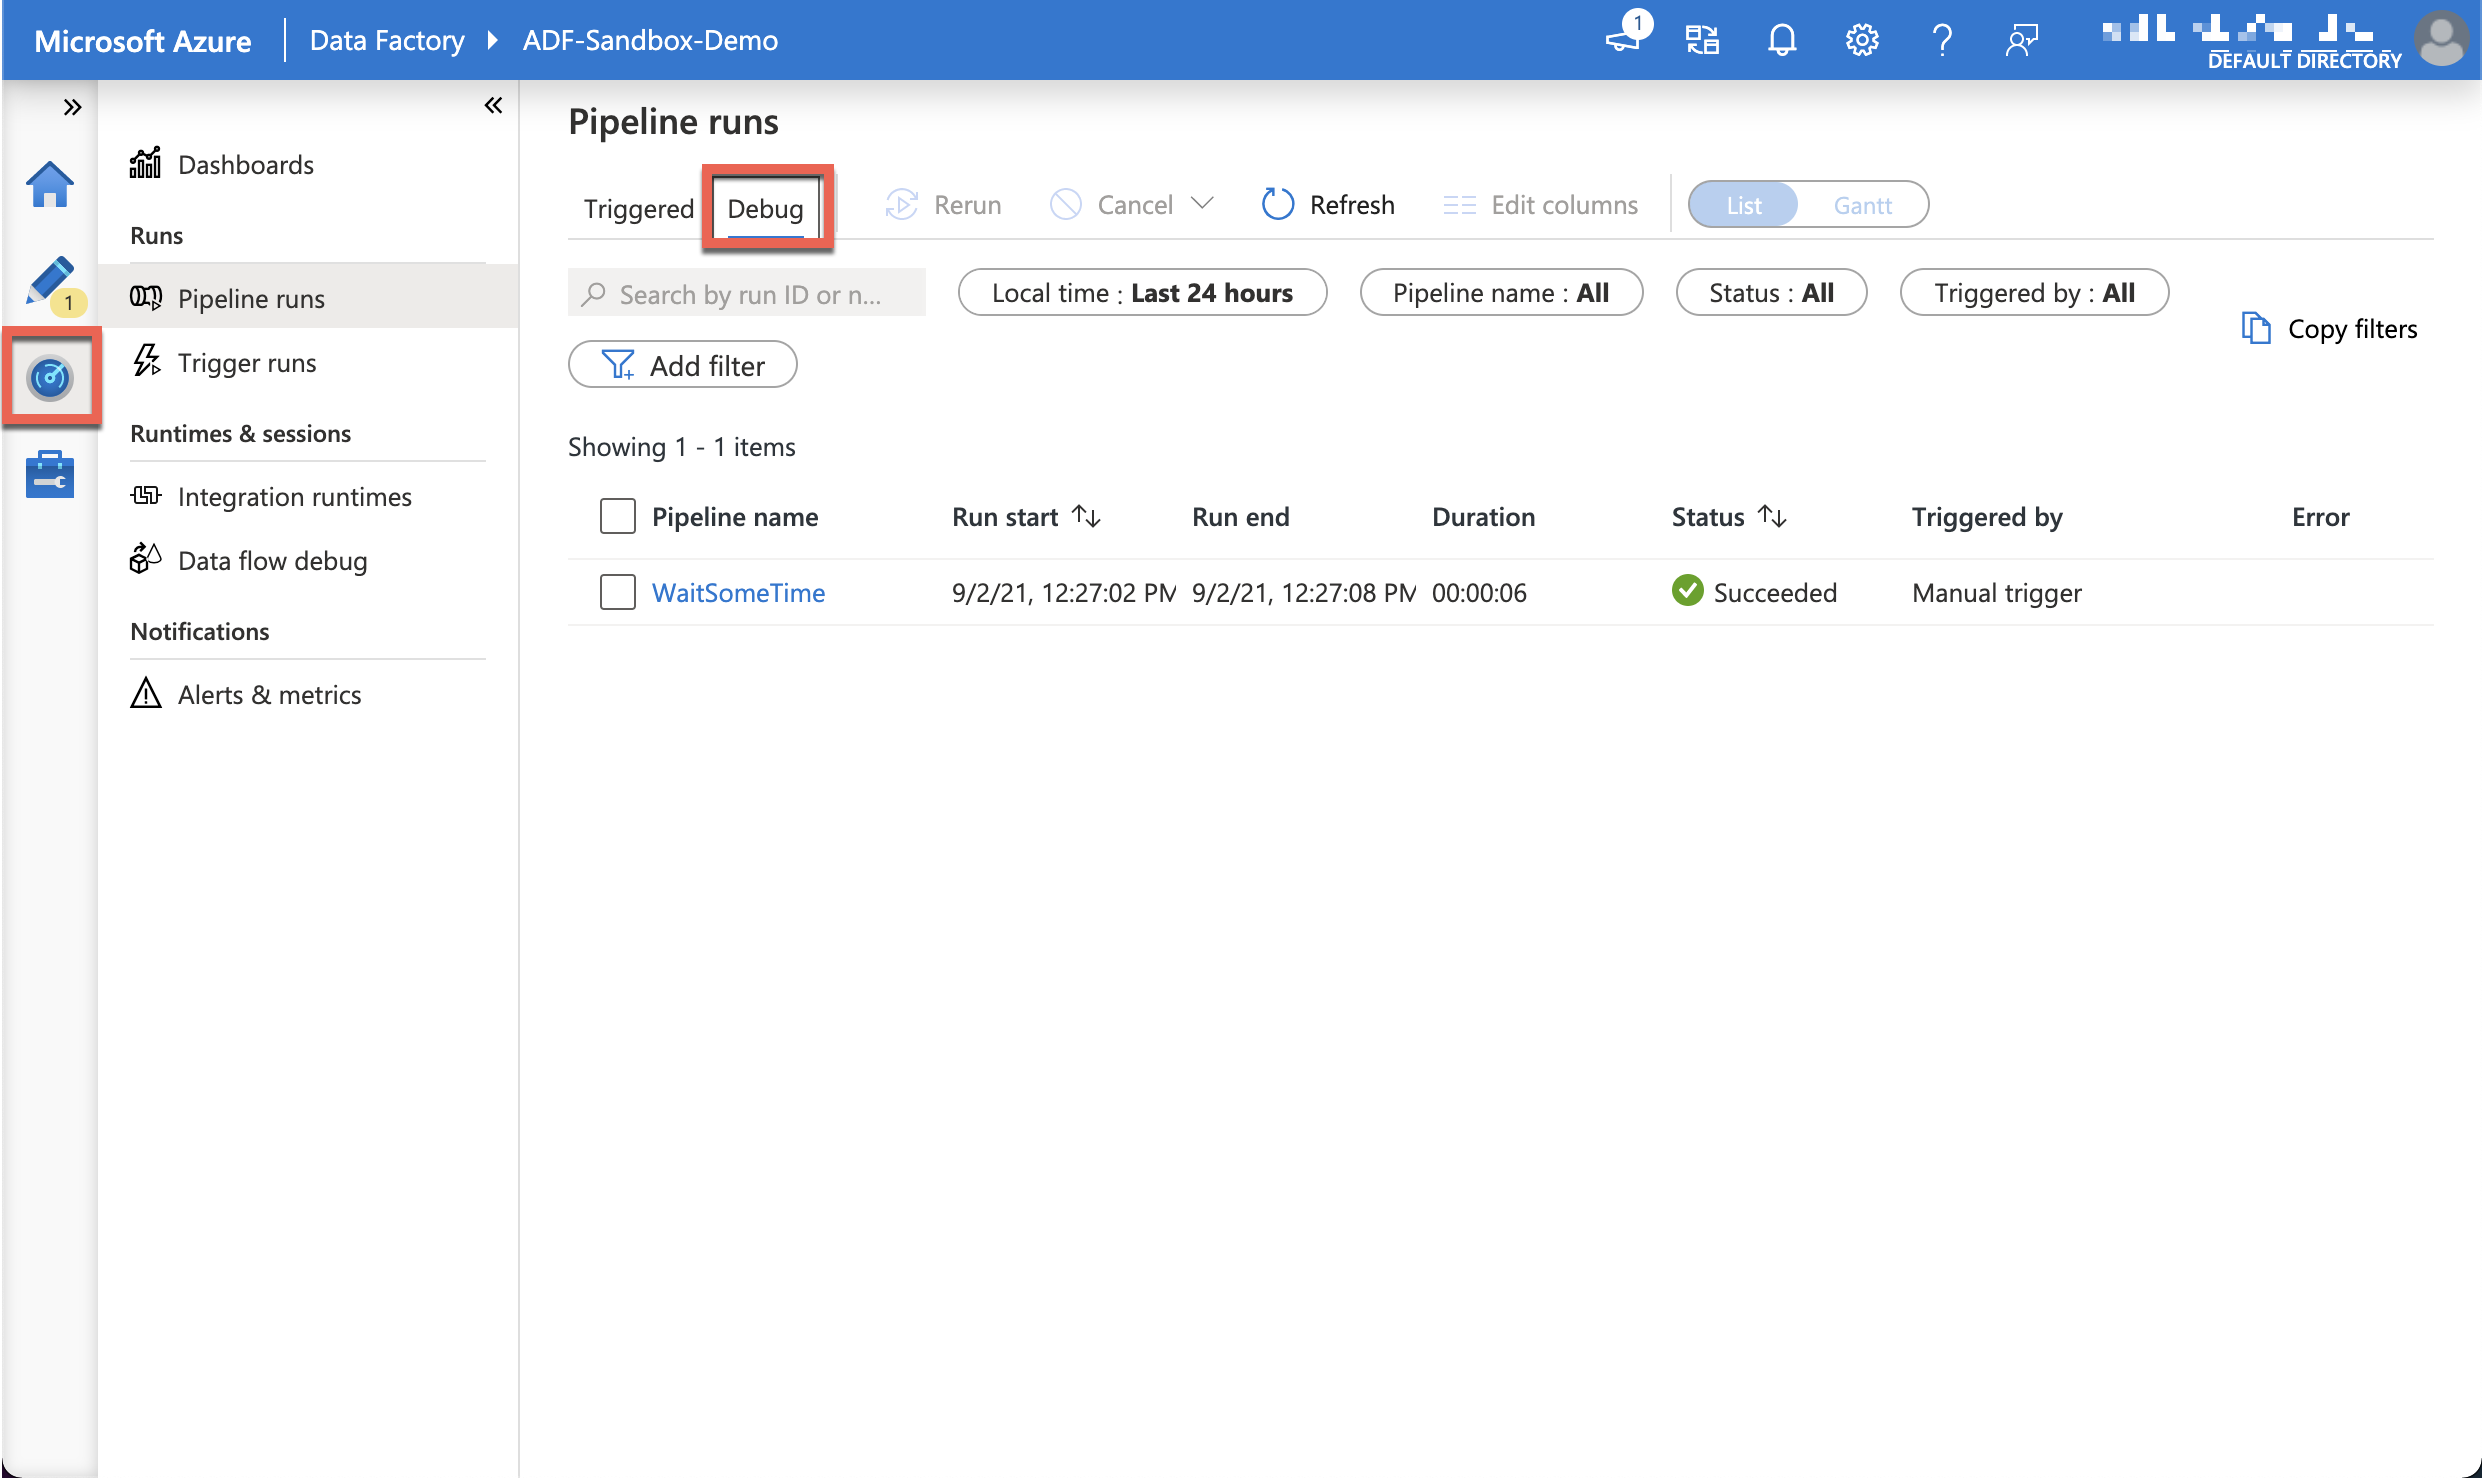
If we look on the monitoring view, we can see that there are no pipeline runs listed in the Triggered tab, they are instead listed in the Debug tab. When we run a pipeline with the debug button, it runs the code as it is in the developer sandbox.
So what happens if we try and trigger our new pipeline now. Well we get an error. We have not deployed our new pipeline, and so we can’t use the trigger now option.
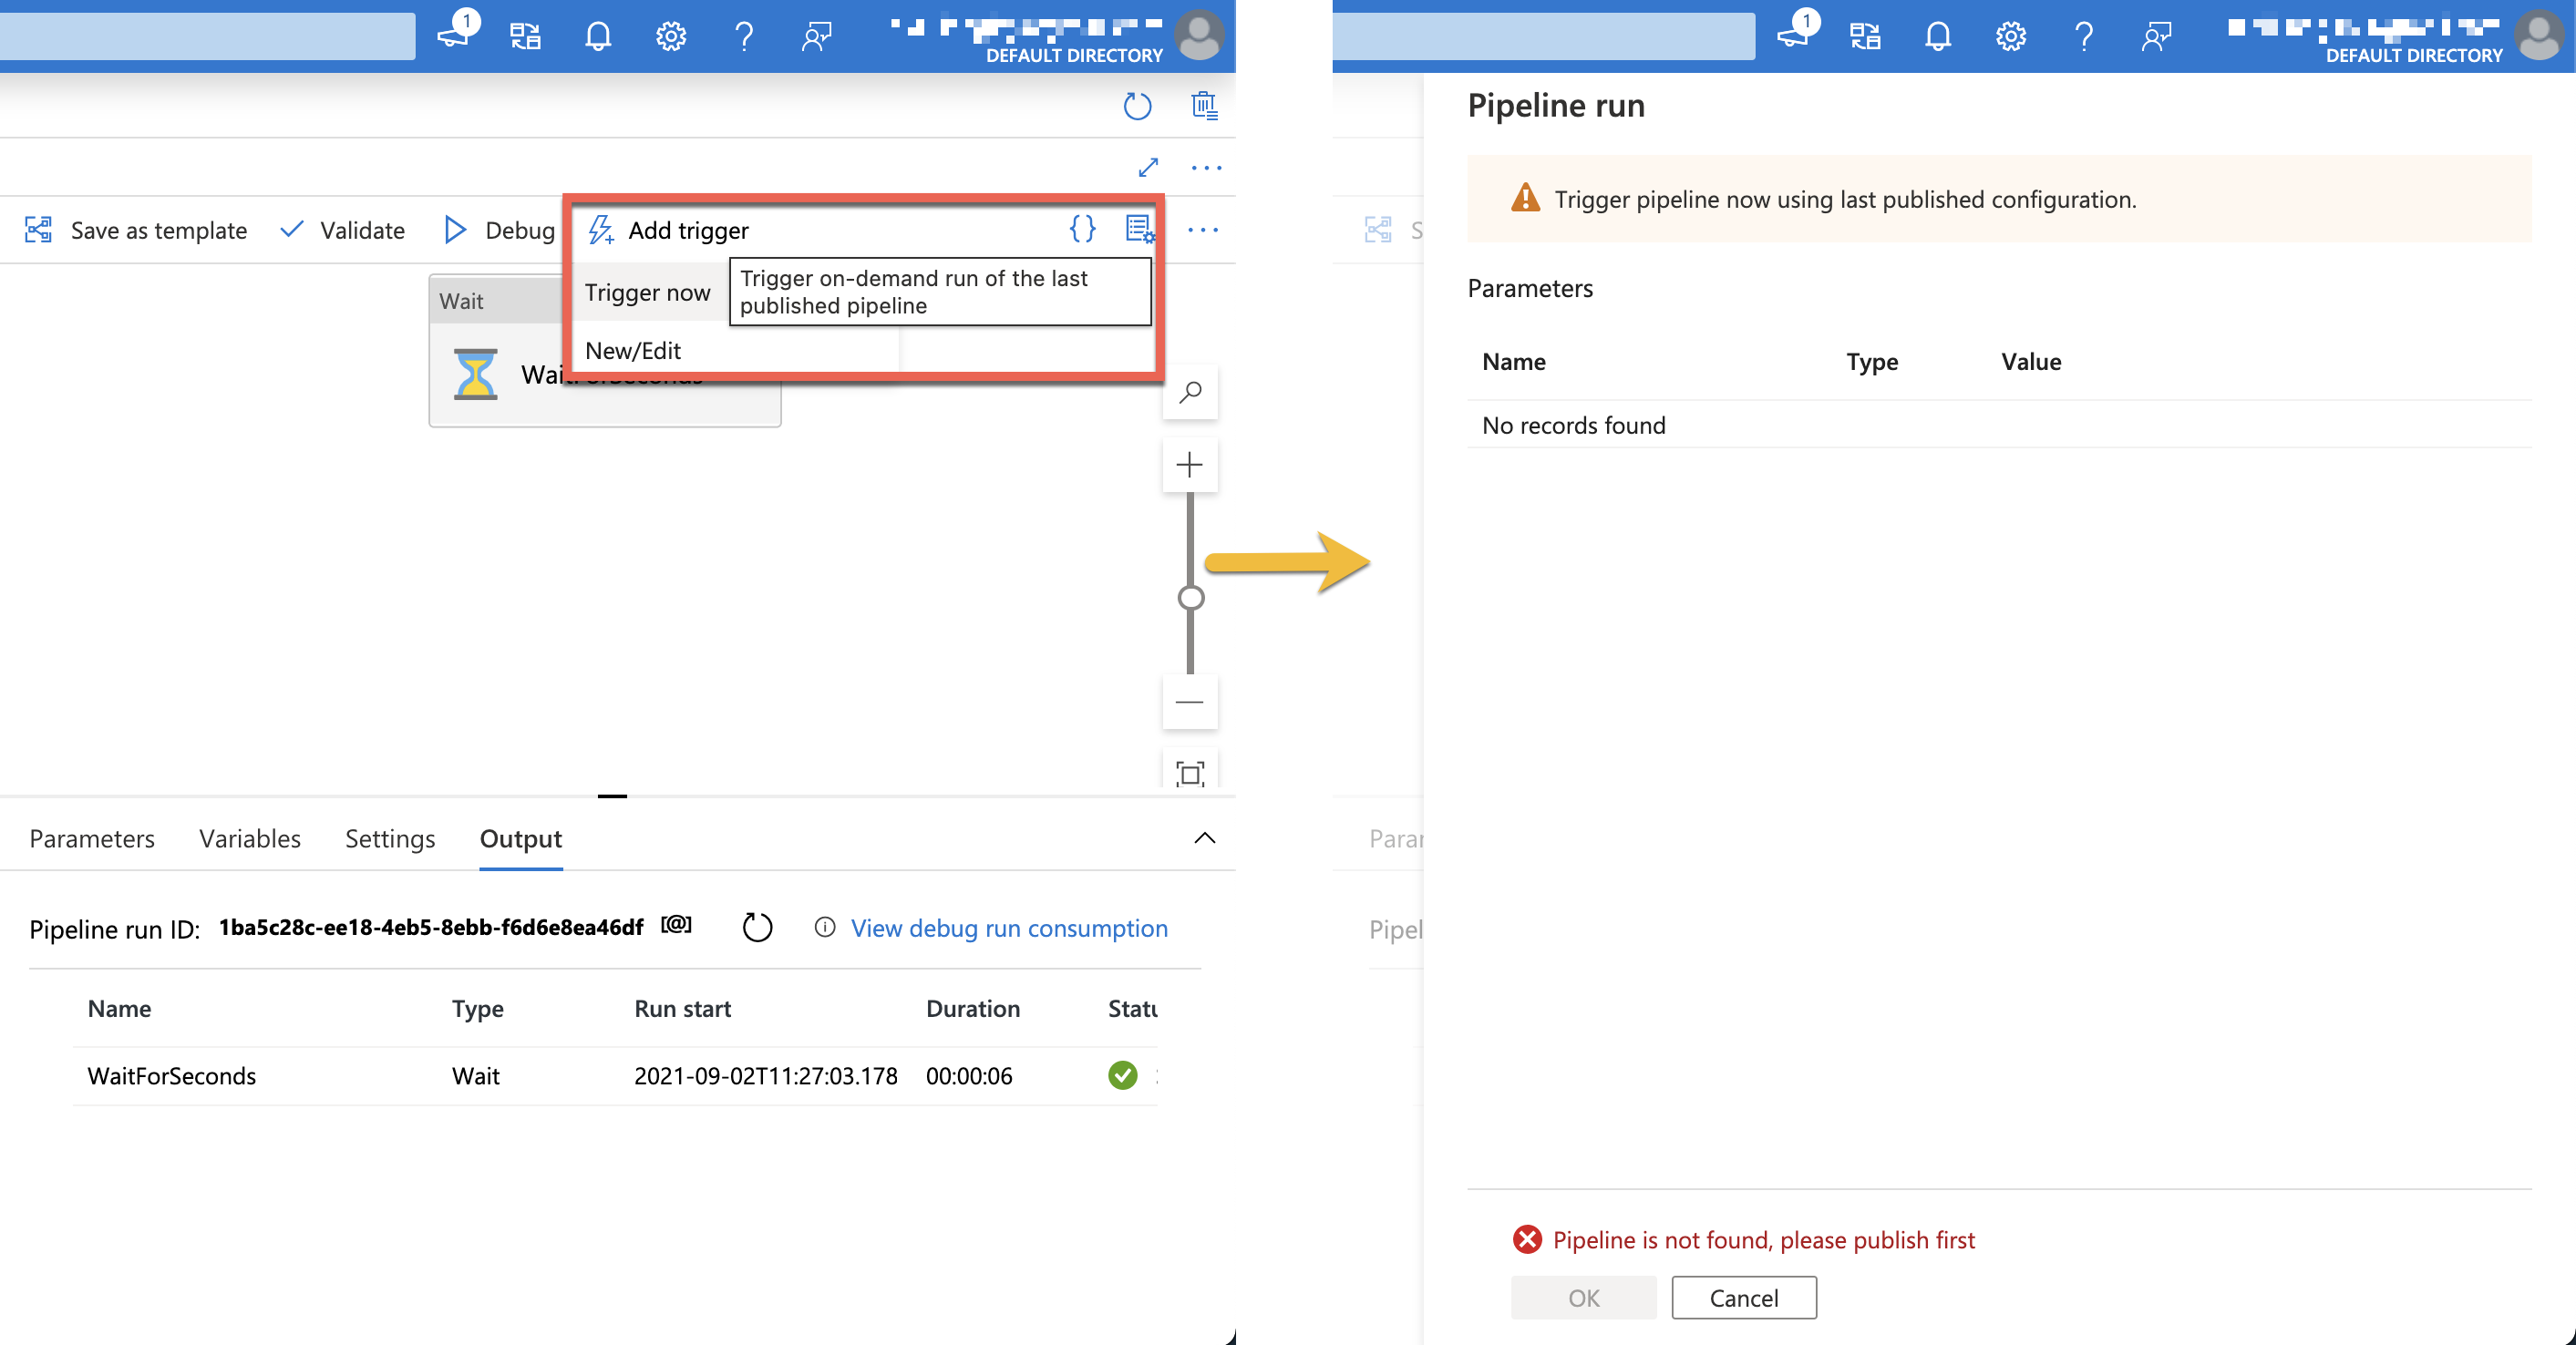
So, to run a pipeline to test it we have two choices
- Debug the version of the pipeline in the development sandbox
- Trigger the published version of the pipeline
Publishing
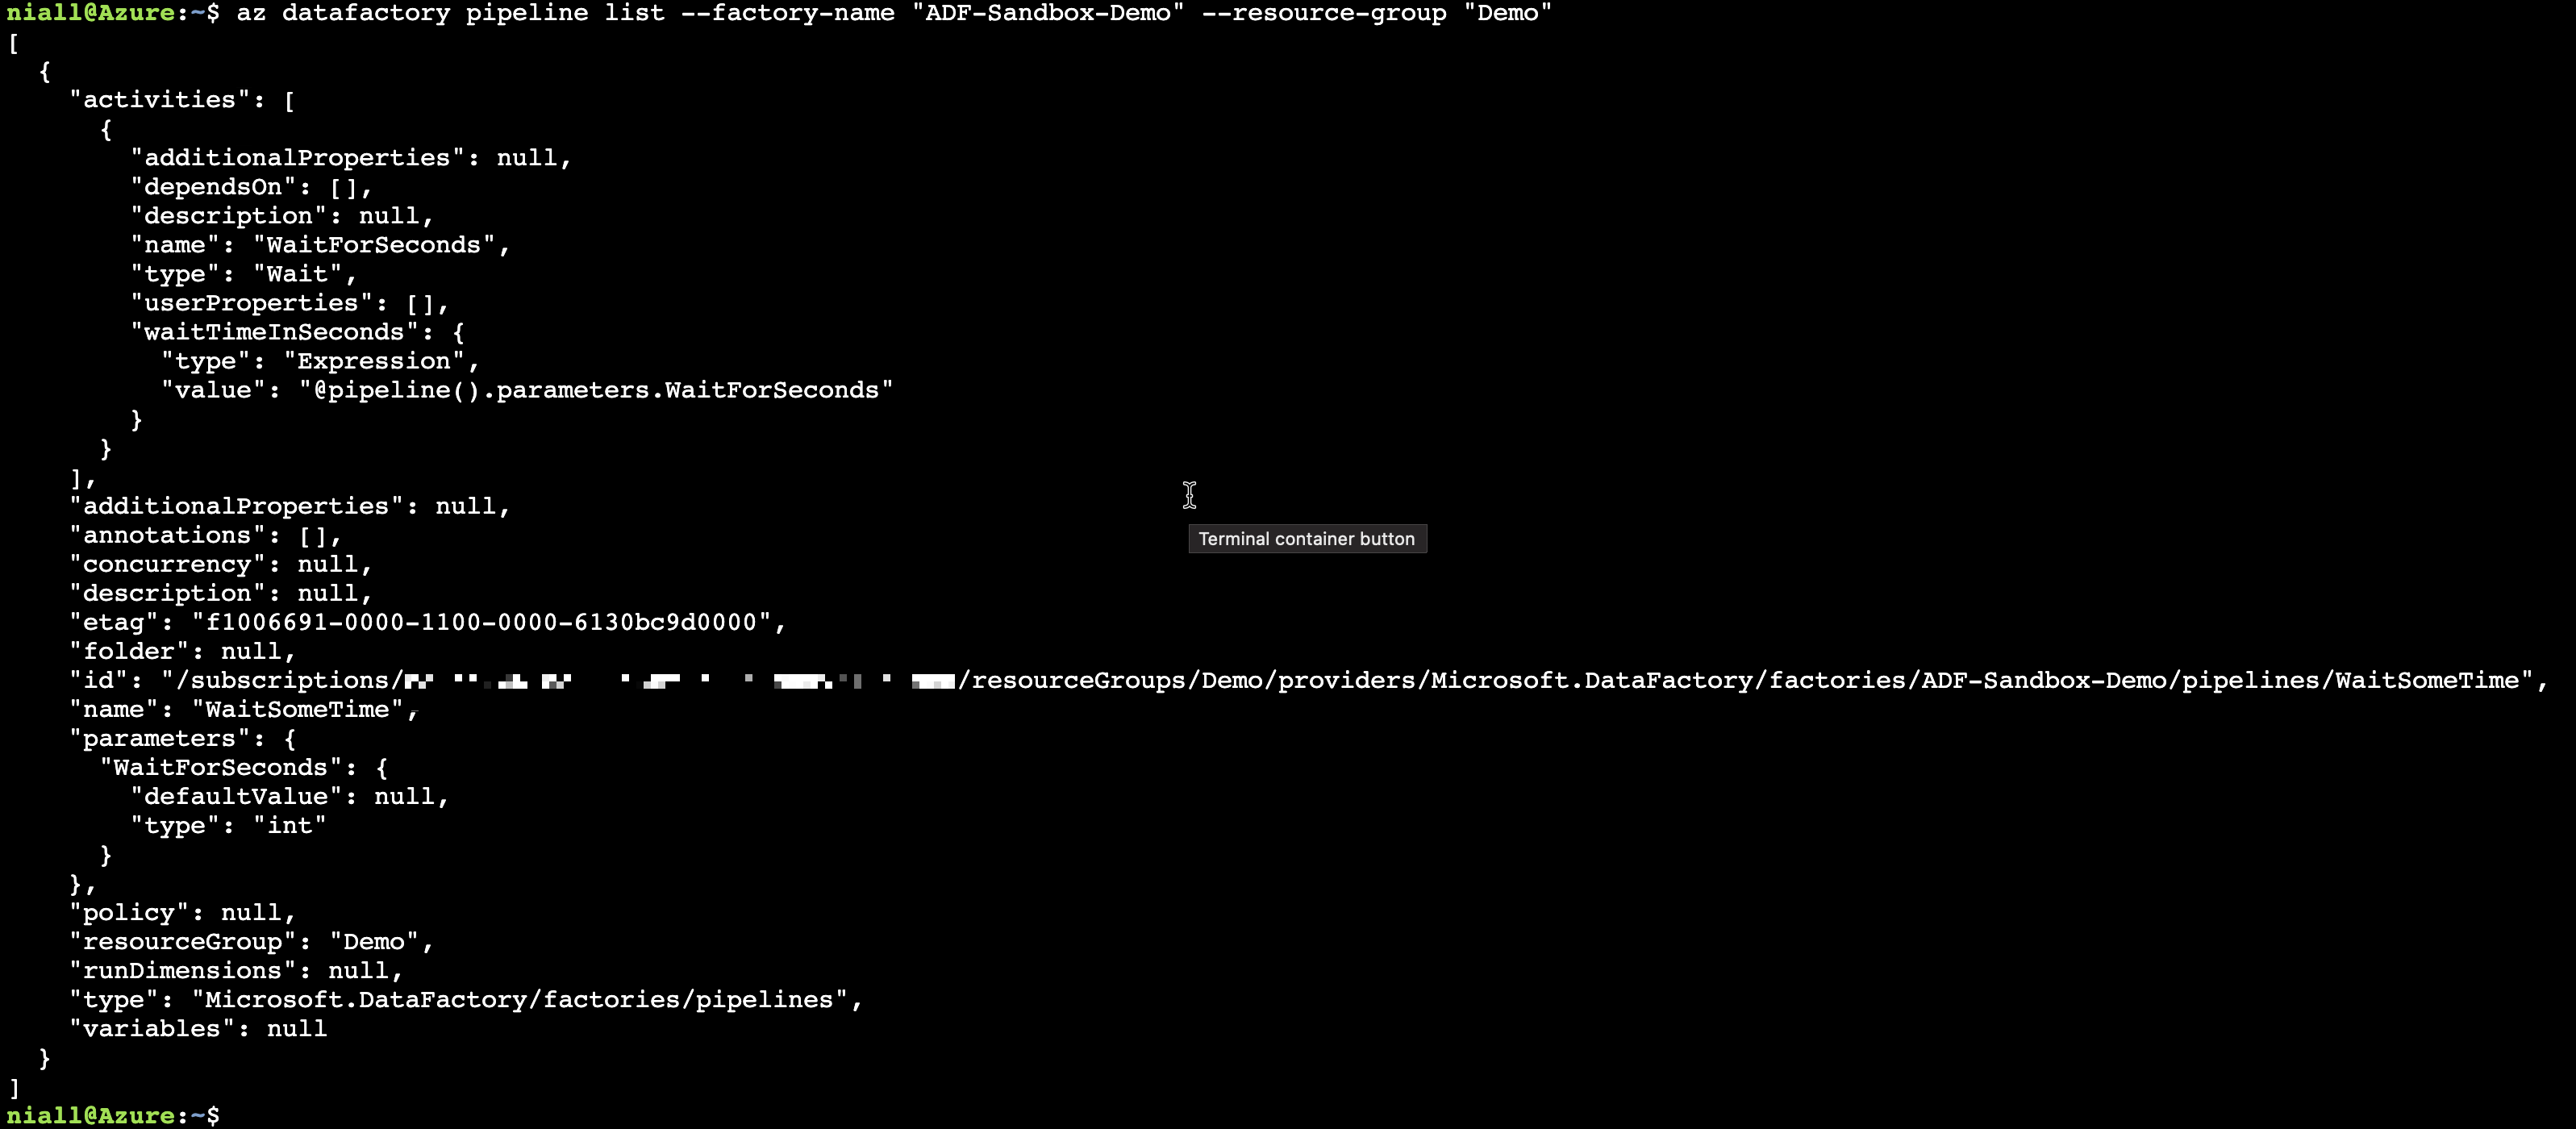
As we mentioned earlier, only the Azure Data Factory Studio GUI can interact with code that is in the developer sandbox. So if for example, we want to use another service or app to trigger our pipeline, we must publish it first. We can check this out by using the Azure CLI, running this command:
az datafactory pipeline list –factory-name “exampleFactoryName” –resource-group “exampleResourceGroup”

If I publish the pipeline and run the Az CLI command again, my new pipeline is listed.
Interesting, What’s the Impact?
So what impact does this have? I typically have some external services that need to call my pipelines, for example Paul Andrews excellent open source ADF orchestration framework, Orchestrate.procfwk. This means I cannot fully test my pipeline and its trigger mechanism until it is published, as the external services can only call the published version of the pipeline. For me, a key part of data engineering is bringing the rigour and testing associated with good software engineering to building data platforms and pipelines.
We also must publish our work in order to save it, which might be a pain if we want to keep developing while we run some tests against our pipeline, or if we have made a breaking change to an object shared with another published pipeline.
But What About Git?
So we know that we have two sides to ADF, the published view that other services can see and interact with via the Az CLI, PowerShell Az module, Azure REST API and ARM templates, and the the development sandbox that only the Azure Data Factory Studio GUI uses. But how does this change when we enable git integration?
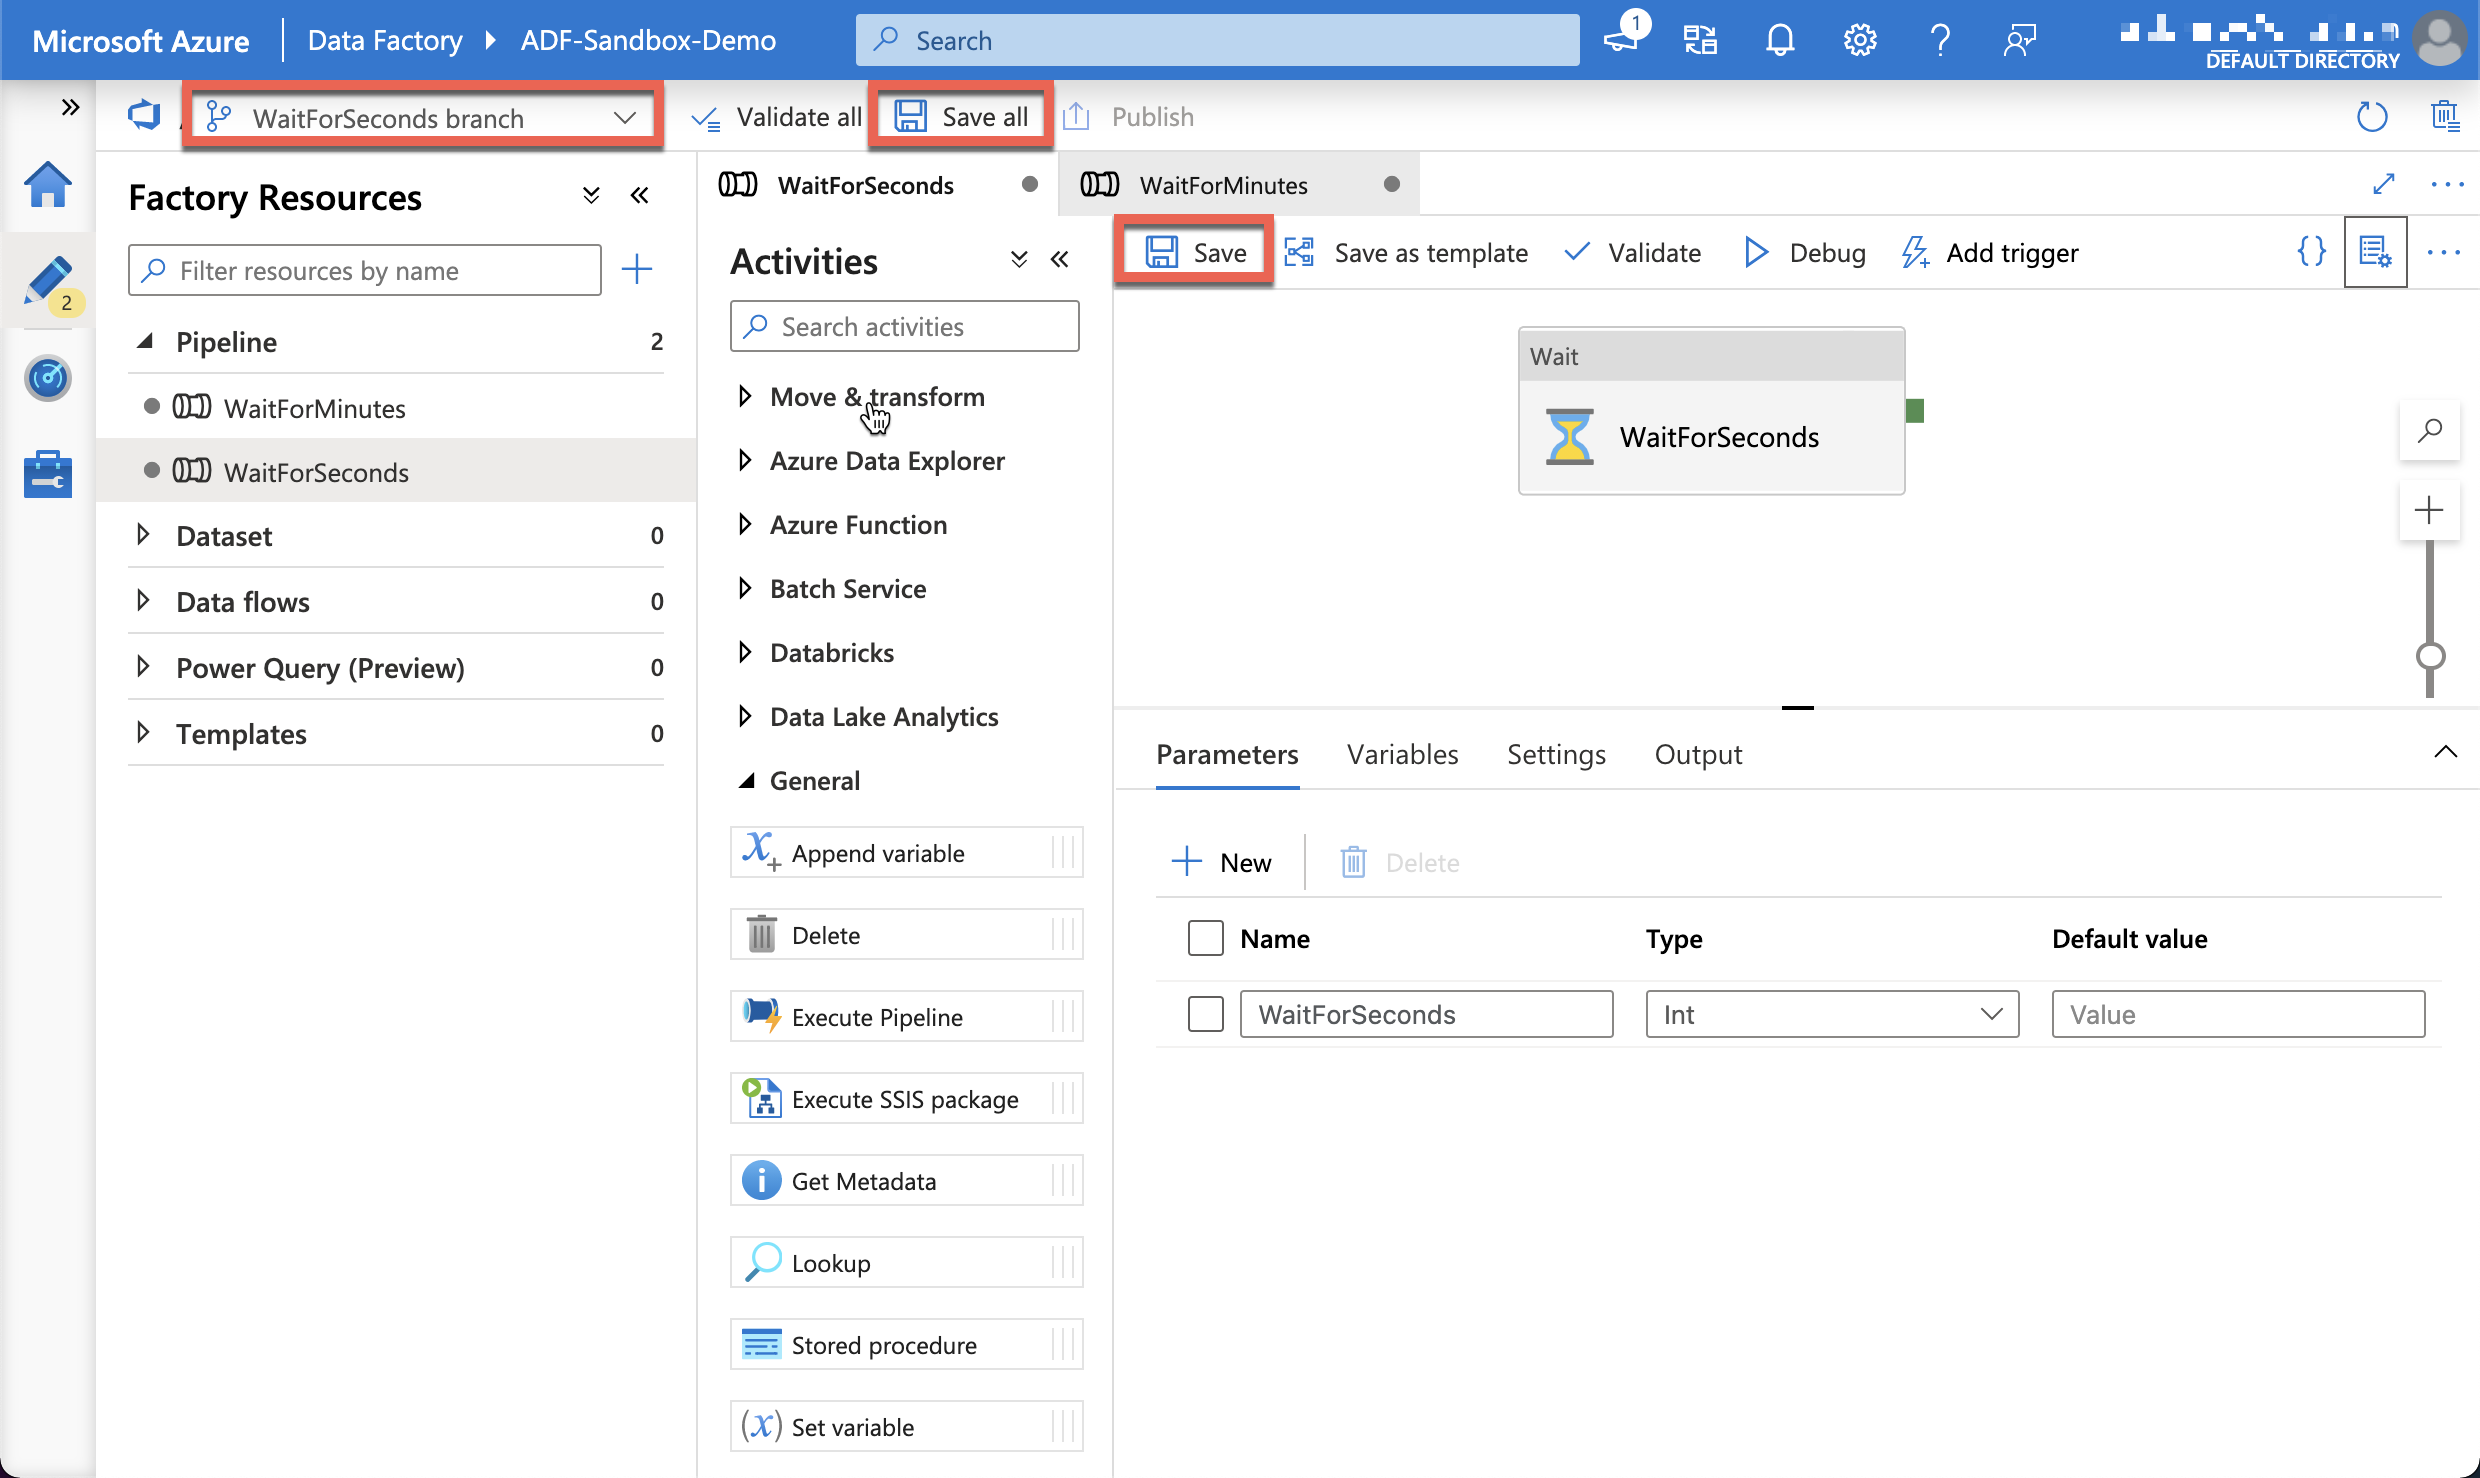
Not much really changes in terms of the views of code in ADF. We can now save changes to objects, which creates a commit in the git branch (although annoyingly you cannot set the commit message). But just like working with git on your local machine, you can only have one branch active within an instance (browser tab) of the Azure Data Factory Studio GUI at any one time. So when we debug a pipeline, it debugs the code we have on our current branch, and when we trigger a pipeline, it uses the published code.
There is good guide to setting up ADF to use a Git repo in the Microsoft documentation, and there is video that shows how CI works when using the Git integration.
Git & Publishing
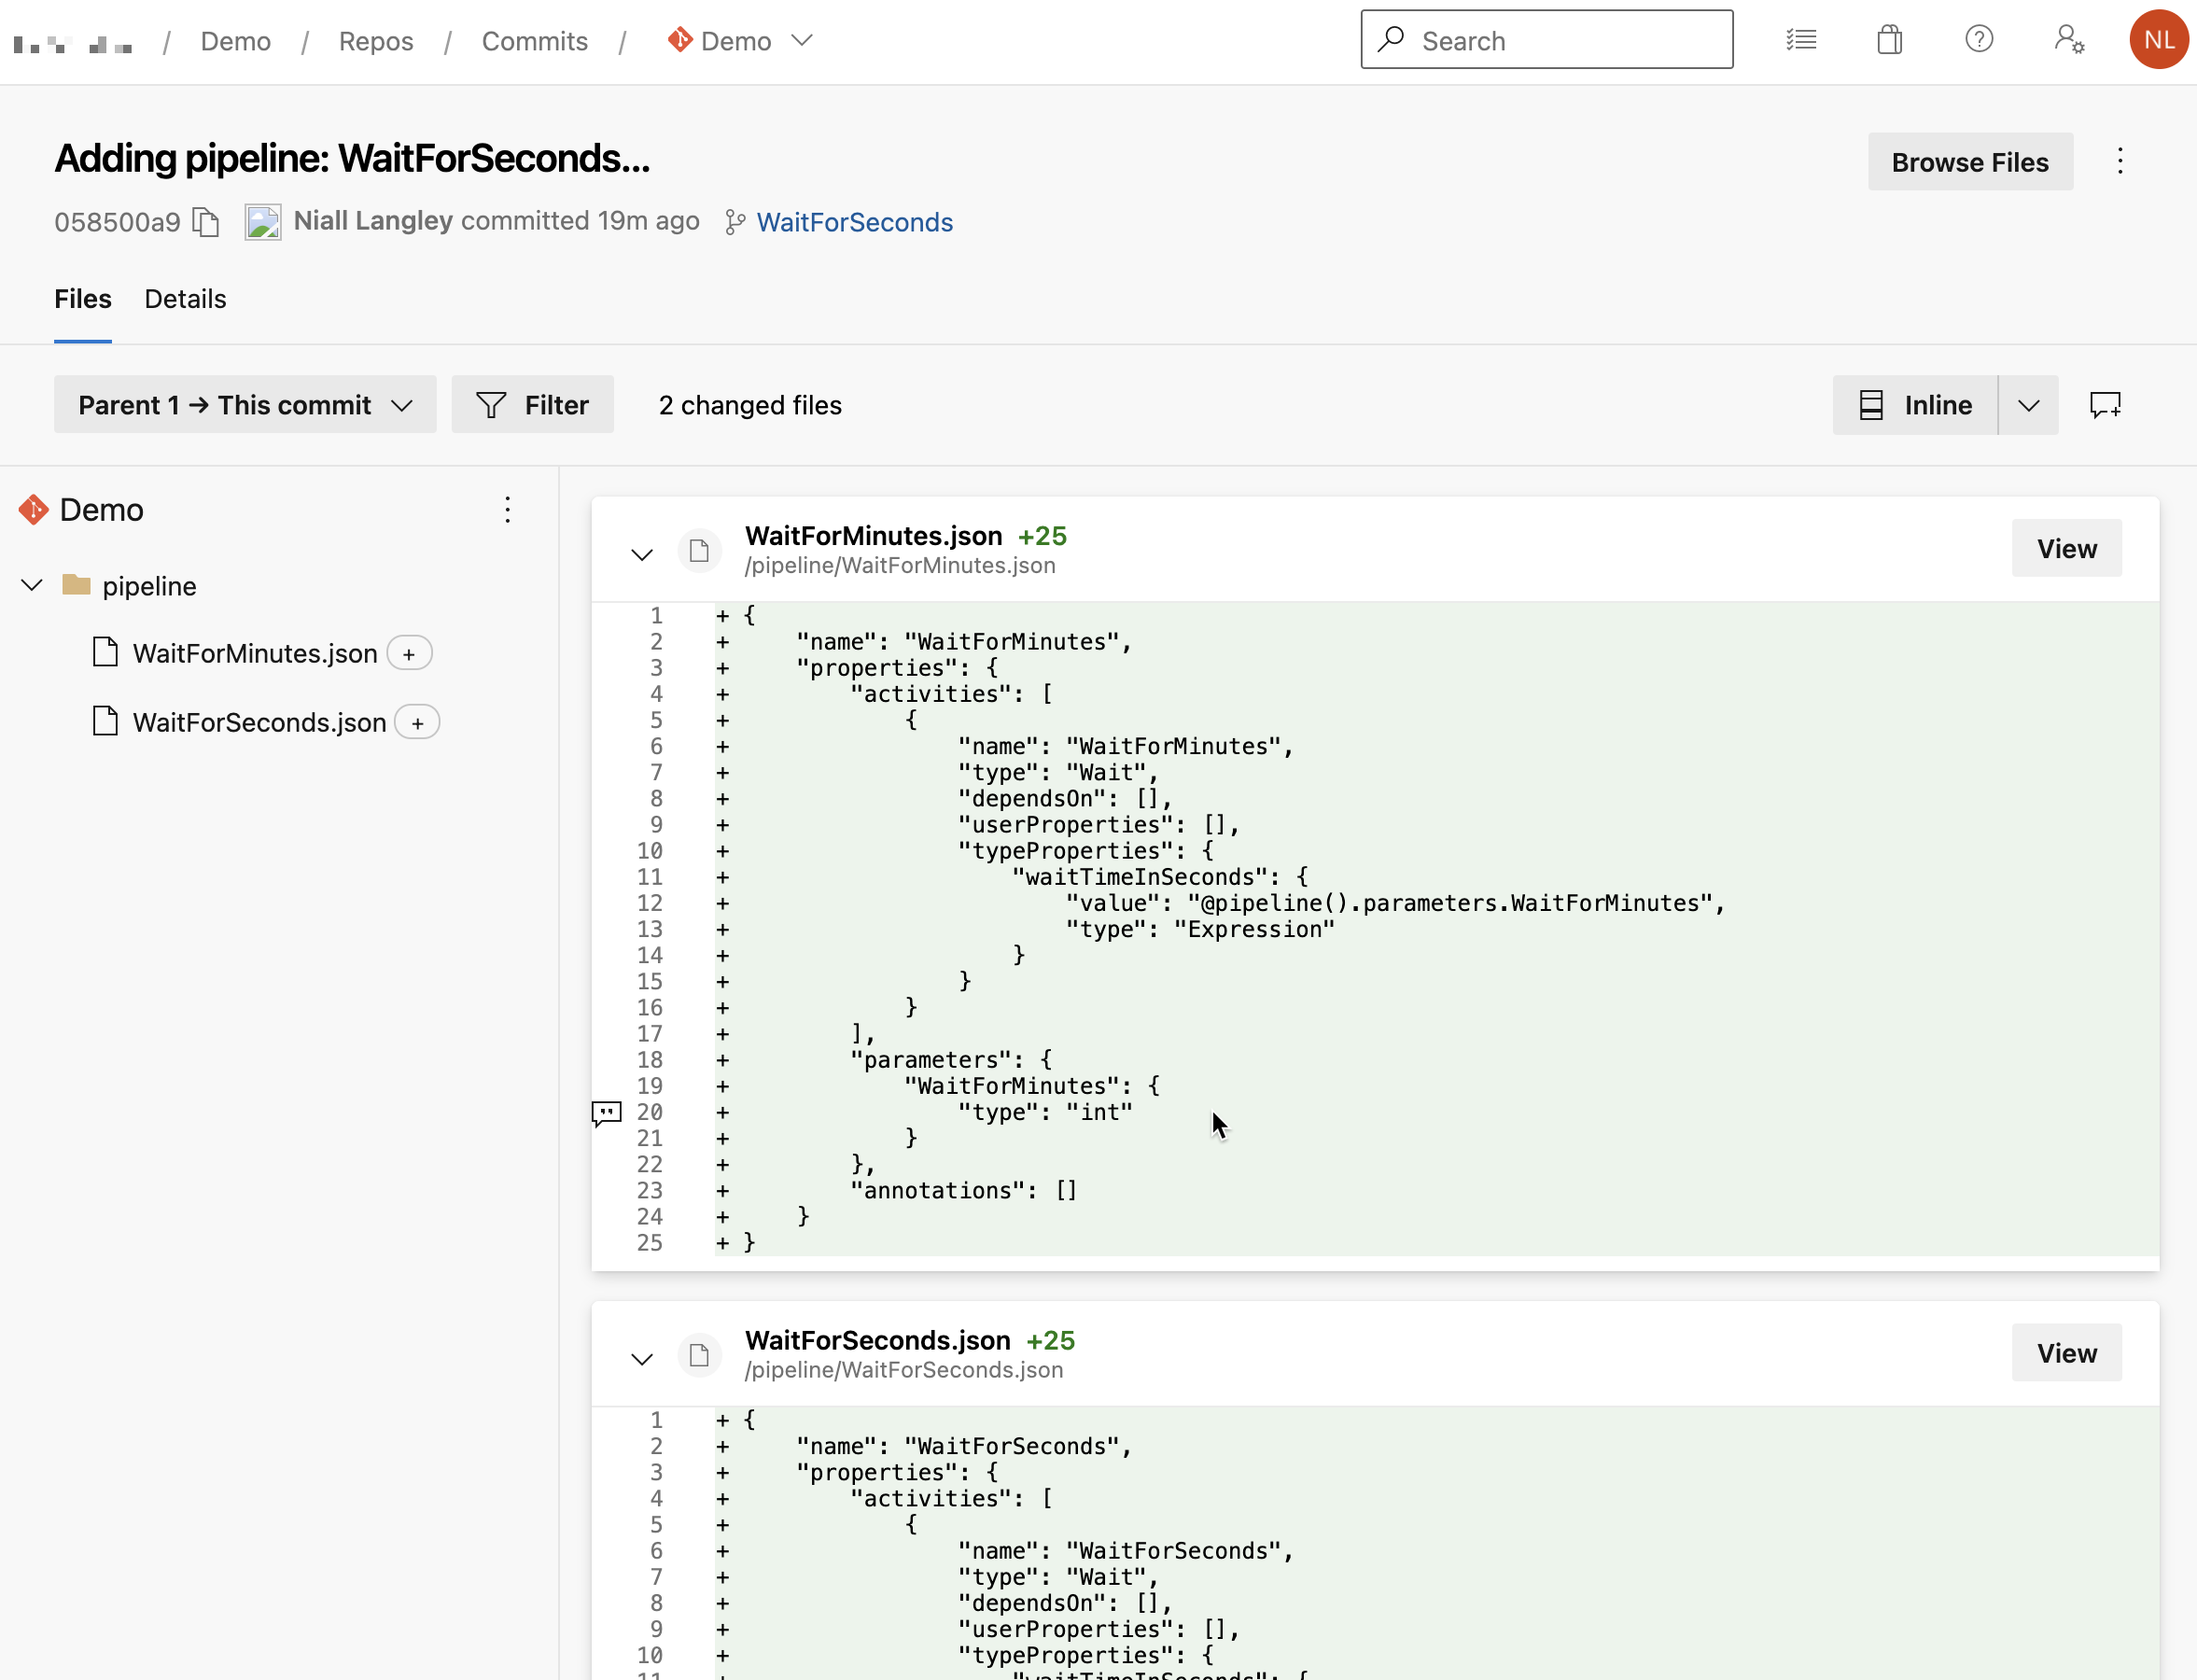
This is where for me it gets a little frustrating or me. The picture below is from the video linked above. When we click the publish button, we must be on the branch configured as the collaboration branch.
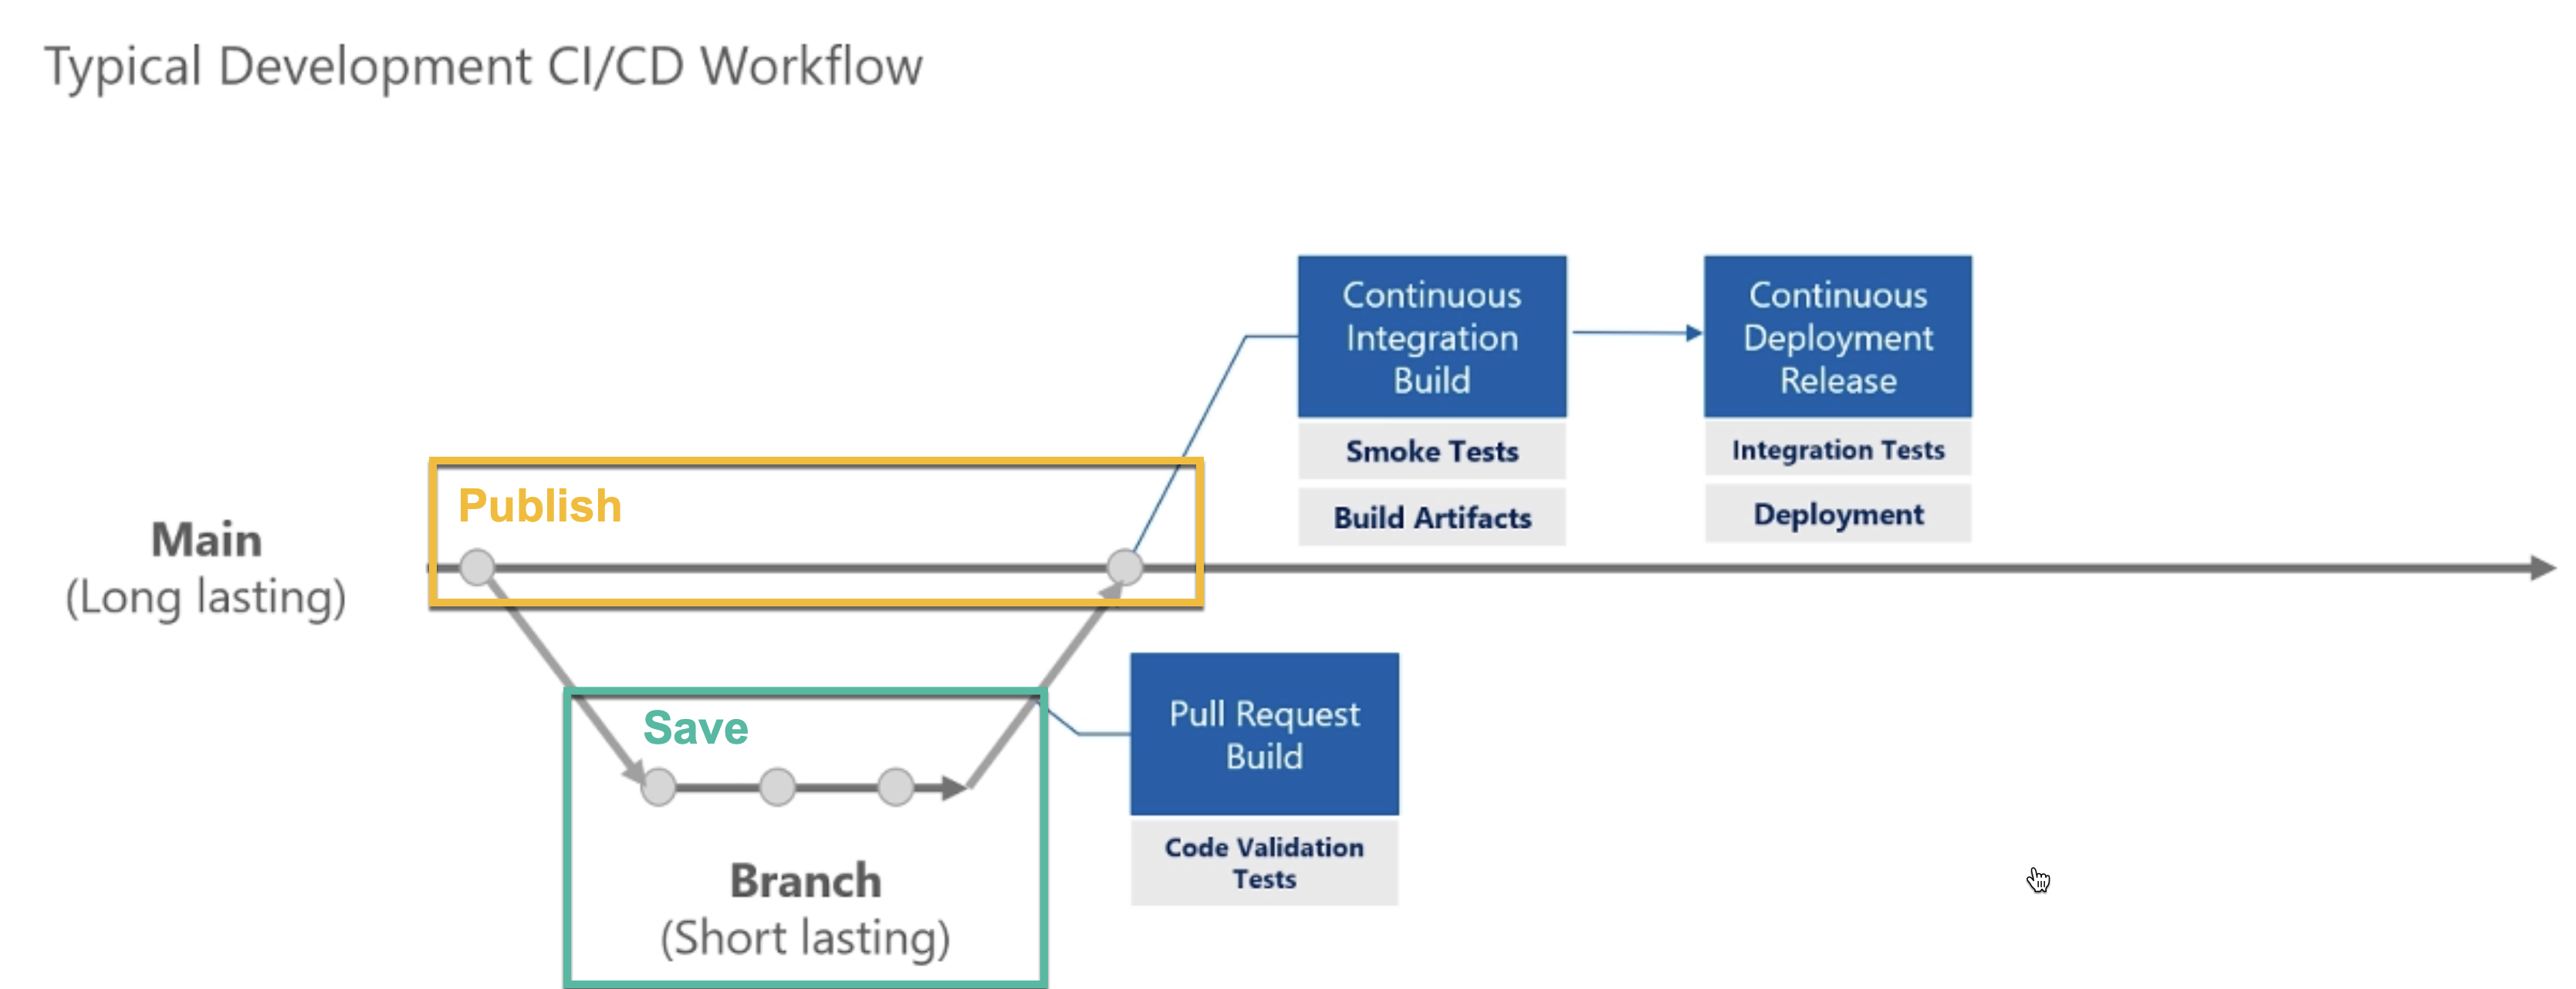
The commits from the Azure Data Factory Studio GUI save button in green, and the commit the publish button uses to publish those changes. Note that the code must be merged to the collaboration branch before we merge.
This means we must have merged our changes, ideally using a pull request, before we can publish them. In order to test the integration into the other parts of our data platform, those changes must be published. This means that I cannot test my orchestration framework against any changes I make until the branch has been merged.
How I Like to Publish & Deploy
I like to make sure that a branch is tested before it is merged into the main branch, for me this is just good software engineering practice. It also helps me to think about how to automate those tests, to ensure we can make it part of our CI build and test process.
Fortunately another great open source tool can help us here, the also excellent azure.datafactory.tools by Kamil Nowinski. This is a PowerShell deployment tool that takes the ADF object definition JSON files, and deploys/publishes them to a data factory. It supports filtering objects, and has options to replace nodes within the JSON from a config file, so we can replace server names as we deploy to different environments. This is what I like use for deploying code from a CI/CD pipeline.
But what about developing and testing code before we merge it? For this I like to give each developer their own environment, with their own data factories. The pros and cons of this approach as I see them are listed below.
| Advantages | Disadvantages |
|---|---|
| Can publish without merging | Changing branch requires disconnecting the data factory from git and then reconnecting it with the correct collaboration branch |
| Other services can call published code | |
| Developers don’t overwrite each others code when publishing |
CI/CD Testing
And what about testing during the CI build? I like to use Azure Dev Test Labs to create a whole test environment on the fly, run a bunch of tests to make sure everything works, and then publish the test report into the pull request. That way I only merge code that I know has passed its tests and works, and we get automated regression testing each time we build. I’ll have more on how that works in future blogs posts.